Verification methods
There are three different methods to verify data:
- Verify already measured data without a reference
Select the measured data to be verified. The software automatically creates a verification plane using the average of the selected data, and compares it to the selected data. Refer to Verify data without a reference step-by-step. - Verify already measured data using a reference
Select the measured data to be verified, then select the reference data. The software compares the selected data to the reference data. Refer to Verify data using a reference step-by-step. - Define a reference and start measuring to verify data
Select the reference data, then start to measure points. The measured points are directly compared to the defined reference data. Refer to Verify data while measuring step-by-step.
Verify data without a reference step-by-step
➜ Make sure that the data to be verified is active within the current
job. To reduce the amount of visible data, use the layer manager or visibility filters. See also: Reducing the Number of Visible Elements/Objects in Map View
➜ Sample screenshots are taken from iCON site.
- Open the Verification app.

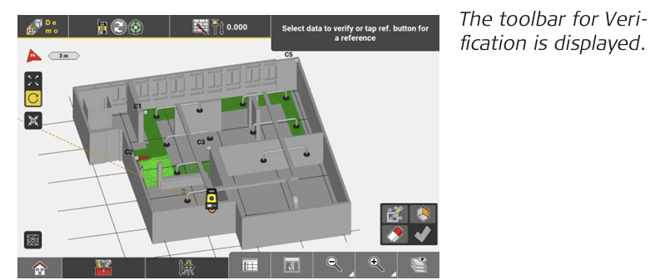
- To select the data to be verified, tap at least three single points, a point cloud or a grid-scan point cloud.
• To select multiple points quickly using the Window Selection mode, tap .
.
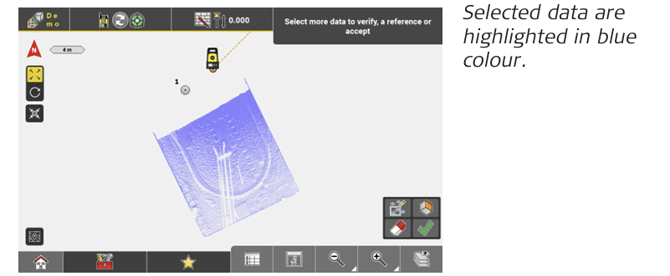
• To add more data to the already selected data, tap the respective elements in the map. To deselect data, tap the selected elements again.
• To deselect all selected data at once, tap .
.
- When all data to be verified are selected, tap
 .
.
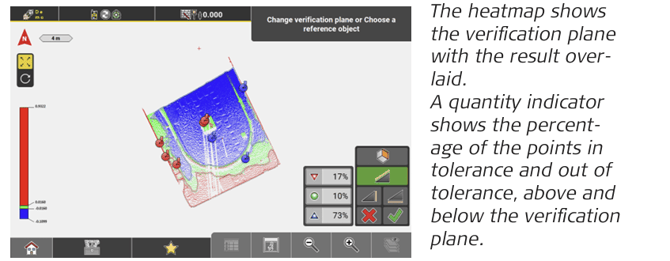
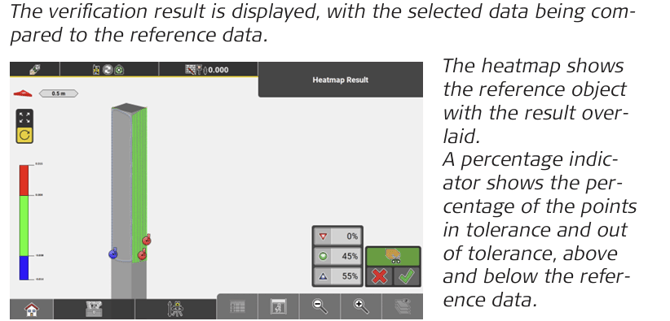
The software automatically creates a verification plane using the average of the selected data. A preview of the verification result is displayed, with the selected data being compared to the verification plane.
➜ To define another reference than the verification plane, tap . For information on how to define a reference, refer to Verify data using a reference step-by-step.
➜ To change the settings of the colour scale or the tolerance settings, tap and hold the scale. Refer to 9.3.2 Scale Options. - • To define the orientation of the reference plane, tap the respective toolbar button:
- Vertical
- Horizontal
- Tilted
The preview is updated accordingly.
• To return to the previous step, tap .
.
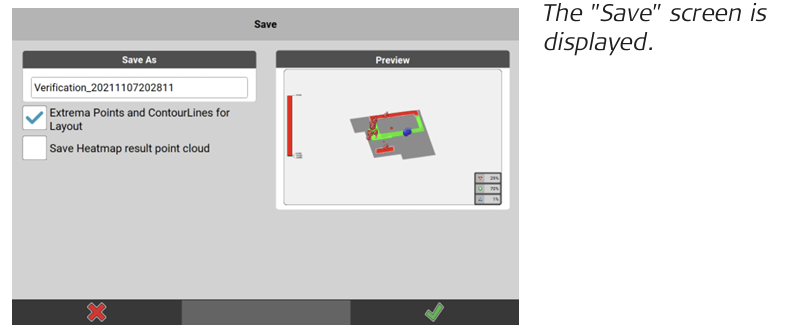
• To store the verification result, tap Store.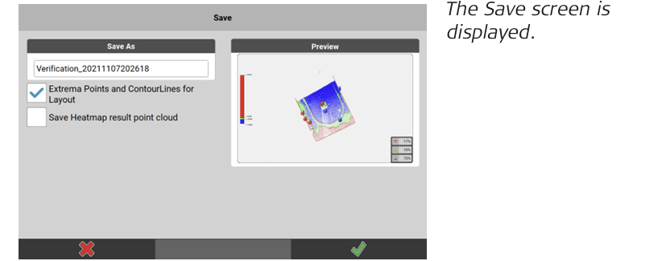
- • If necessary, edit the file name.
• To store extrema points and contour lines, activate the respective checkbox.
• To store the heatmap result as a coloured point cloud, activate the respective checkbox.
• To return to the previous step, tap .
.
• To accept and store the verification result, tap .
.
➜ To export the verification result in a report, select Reports from the Home screen/Admin Panel. Refer to: 2.3 How to Create a Report .
Verify data using a reference step-by-step
➜ Make sure that the data to be verified is active within the current job. To reduce the amount of visible data, use the layer manager or visibility filters. See also: Reducing the Number of Visible Elements/Objects in Map View
➜ Sample screenshots are taken from iCON build.
- Open the Verification app.
- To select the data to be verified, tap at least three single points, a point cloud or a data base.
• To select multiple points and point clouds quickly using the
• Window Selection mode, tap . To add more data to the already selected data, tap the respective elements in the map. To deselect data, tap the selected elements again.
• To deselect all selected data at once, tap .
.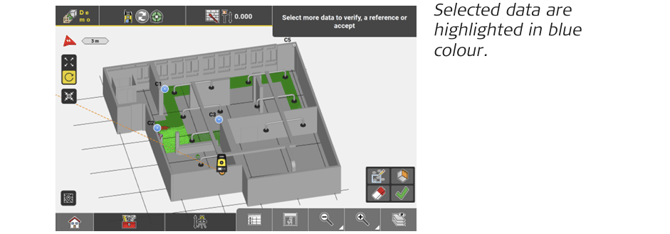
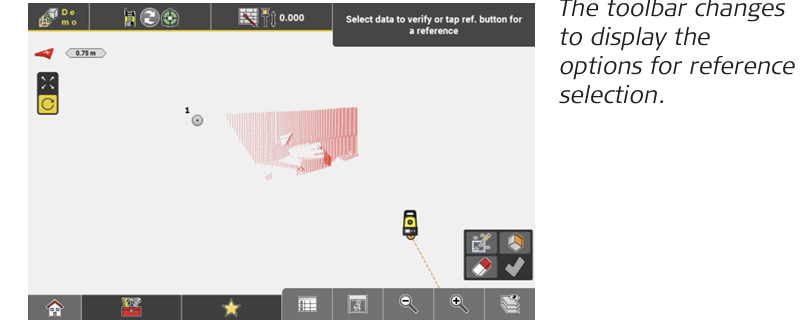
- To define a reference for verification, tap
 .
.
- There are several options to define a reference:
• Tap a surface, object or point cloud to define it as reference.
• To define horizontal reference planes, select or measure a single point or enter a height value.
• To define a vertical reference plane, select or measure two points. The orientation of the plane is defined by the line through these points.
• To define a tilted reference plane, select or measure three points. The points can be measured points, surface points, points on IFC objects or points from any imported point file. You have got the option to select points/objects by reading a QR Code. Tap .
.
See also: IFC object selection using QR-code
➜ To be able to use the QR-Scan function your entitlement needs to include the "QR Code Reader license".
More options:
• To shift a vertical or tilted reference plane, tap and enter the shift parameters.
• To clear the defined reference, tap .
.
• To return to the previous step and select more or different data to be verified, tap
- To accept the defined reference and continue, tap
 .
.
Only results close to the referenced IFC object will be displayed. By default, the cut-off values above and below the surface of the reference object are double the tolerance as defined and selected in the Scale Options dialogue.
➜ Tap to see unfiltered results.
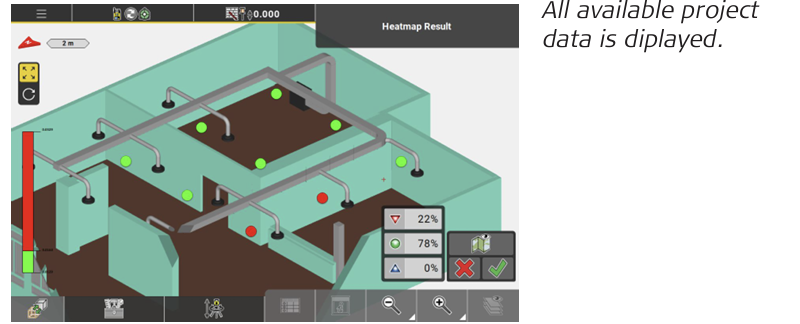
➜ Tap to see all available project data (in addition to the data to be verified and the selected reference data).
➜ To change the settings of the colour scale or the tolerance settings, or to change the cut-off value for the Reference Filter Projection, tap and hold the scale. Refer to 9.3.2 Scale Options. - • To return to the previous step, tap
 .
.
• To store the verification result, tap .
.
- • If necessary, edit the file name.
• To store extrema points and contour lines, activate the respective checkbox below the preview.
• To store the coloured heatmap result as point cloud, activate the respective checkbox below the preview.
• To return to the previous step, tap .
.
• To accept and store the verification result, tap .
.
➜ To export the verification result in a report, select Reports from the Homscreen/Admin Panel. Refer to 2.3 How to Create a Report.
Verify data while measuring step-by-step
➜ Make sure that the data to be verified is active within the current job. To reduce the amount of visible data, use the layer manager or visibility filters. See also: Reducing the Number of Visible Elements/Objects in Map View
➜ Sample screenshots are taken from iCON site.
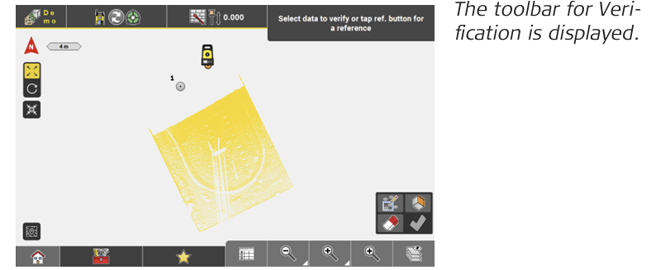
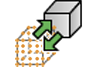
- Open the Verification app.
The toolbar for Verification is displayed.
- To define a reference for verification, tap
 .
.
- There are several options to define a reference:
• Tap a surface, object or point cloud to define it as reference.
• To define horizontal reference planes, select or measure a single point or enter a height value.
• To define a vertical reference plane, select or measure two points. The orientation of the plane is defined by the line through these points.
• To define a tilted reference plane, select or measure three points. The points can be measured points, surface points, points on IFC objects or points from any imported point file.
More options:
• To shift a vertical or tilted reference plane, tap and enter the shift parameters.
• To clear the defined reference, tap .
. - To accept the defined reference and continue, tap
 .
.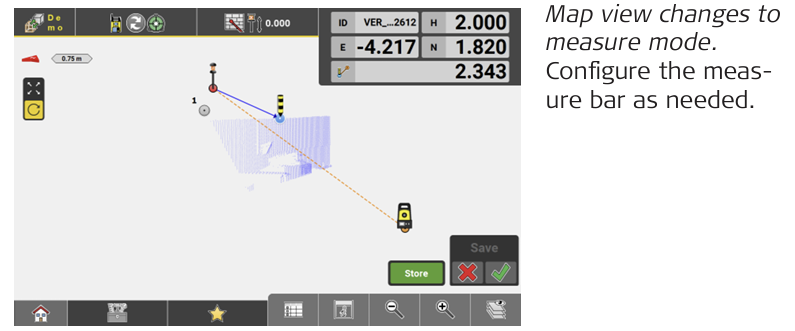
- Measure and store as many points as desired. The colour of the measured points indicates the deviation from the defined reference. The info panel displays the point coordinates and
the perpendicular distance to the reference.
To select a different reference, tap
To close the measure mode, tap .
.
➜ To export the verification result in a report, select Reports from the Home screen/Admin Panel. Refer to: 2.3 How to Create a Report