General description
 Given:
• Instrument is connected and set up with known station and height.
• Points are active within the current job. Refer to Importing data to the project step-by-step.
↪ Note that main workflow refers to Total Station. For GNSS press Measure to record a point.
Stake out/Lay out Points step-by-step- Open the Stakeout/Layout Points app.
↪ Sample screenshots are taken from iCON site > Stakeout app.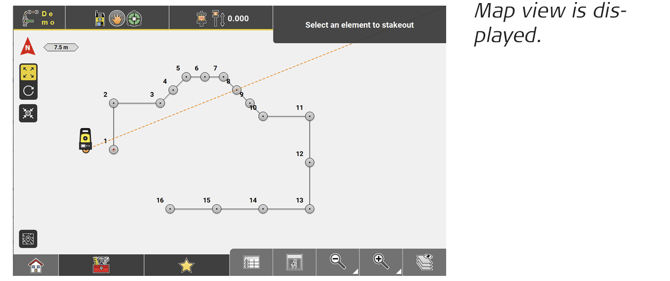
- Select the point to be staked/laid out.
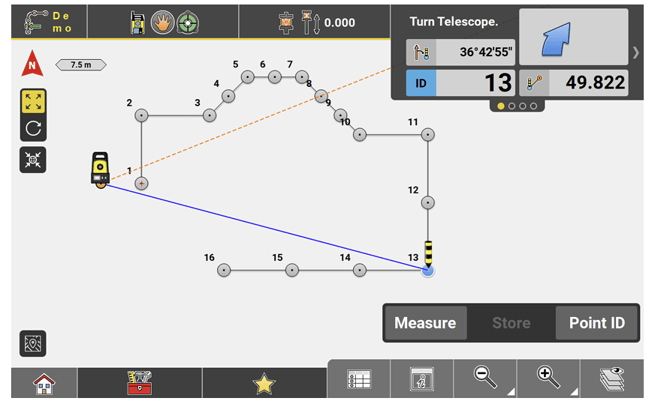
- Once the telescope is aimed at the target point, press Measure.
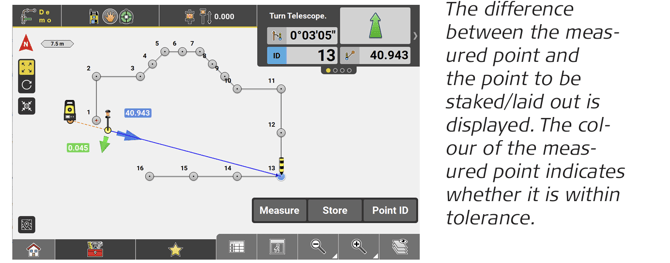
- Follow the guidance to navigate the target to the selected point.
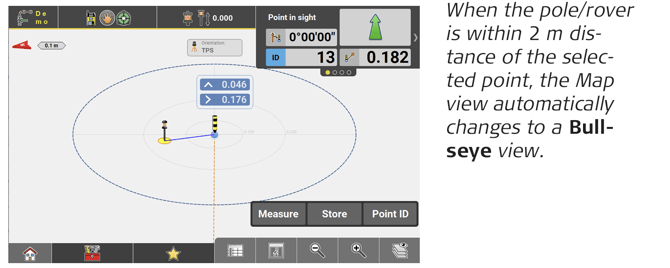
- Move the target until it is within tolerance. Then tap Store to record the point. Or measure again, using Measure.
- Once the location is marked in the field and stored, the next point can be selected, and the process can repeat.
↪ Access View in the Map handler and select Stakeout Point List to get the points to be staked/laid out displayed in a list side by side with the map view. Refer to: Use a Stakeout Point List
↪ Define Measure Mode in the Status 1 menu.
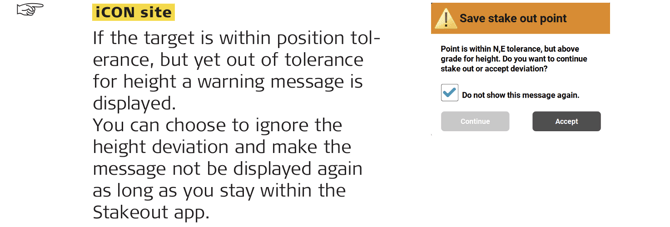
↪ Tolerances can be set in Settings > Units & Tolerances > Tolerances.
↪ GNSS and Robotic Total Station approach: As the target moves around, real-time measurement data and guidance information is constantly displayed in the Information bar. Once the point in the screen turns green, the point is staked/laid out within tolerance. To record points using the Total Station, press Store. If using GNSS, press Measure.
Stake out/Lay out points using Auto Snap
↪ The Auto Snap tool is also available in the Layout Objects app. Layout Objects is an optional license Objects license". See also: Optional licences
Auto Snap displays temporary points, that can be selected for stakeout/layout and added to a stakeout list. See also: Stakeout List function
- Open the Stakeout/Layout Points app.
Map View is displayed.
↪ Sample screenshots are taken from iCON site. - Select an element to be staked out/laid out.
- From the Toolbox select Auto Snap.

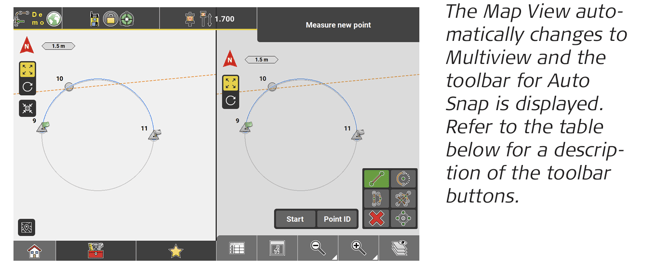
↪ If preferred Multiview can be switched off or configured differently. Refer to: Multiview configuration - From the Toolbar select the kind of points that shall be displayed for stakeout/layout. Multi-selection is possible. By default,
 is active.
In the sample workflow below the centre point of the selected arc/circle shall be staked out/laid out and a temporary point shall be displayed for the centre point. - Select 'Centre Point' from the toolbar. The button turns green.

- Tap Start and navigate the target towards the expected centre point.
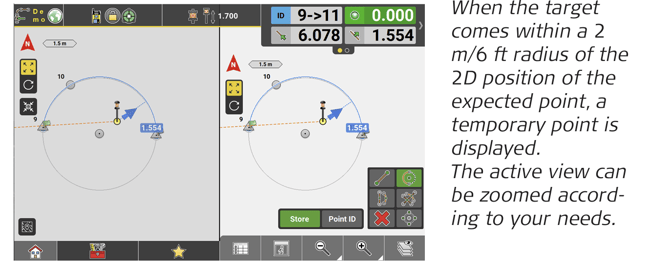
- Select the temporary centre point for stakeout/layout.
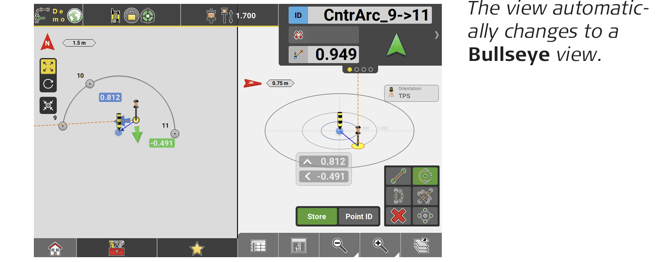
- Move the target towards the temporary point until it is within tolerance.
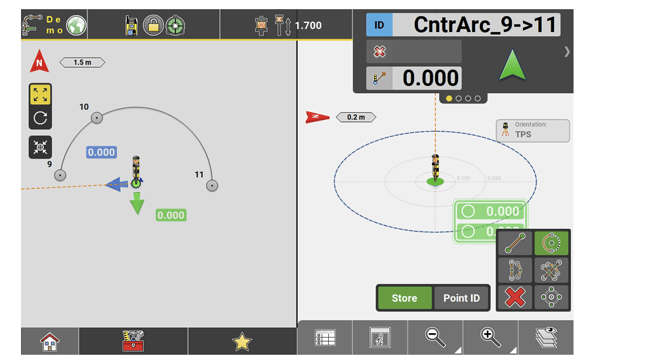
- Tap Store to record the point.
- If desired select another kind of point to be temporarily displayed for stakeout, for example 'Mid-points of Lines/Arcs'.

- Navigate the target towards the expected mid-point of the arc.
 ↪ To leave the Auto Snap mode tap
  .
.
Toolbar button Description 
Activate this button to make temporary points be displayed for start and end points of line/arc elements.
↪ This button is activated by default.
Activate this button to make temporary points be displayed for centre points of arc elements. 
Activate this button to make temporary points be displayed for mid-points of line/arc elements. 
Activate this button to make temporary points be displayed for intersection points of the elements. 
Activate this button to make temporary points be displayed for quarter points on a circle. ↪ More than one button can be activated at a time.
Inherit code information from reference point
↪ Inherit Code is available in the following applications:
– Stakeout iCON site + iCON build Plus
– Layout Points iCON build + iCON site Plus
– Layout Objects optional license
↪ For detailed information on coding refer to: Code Management
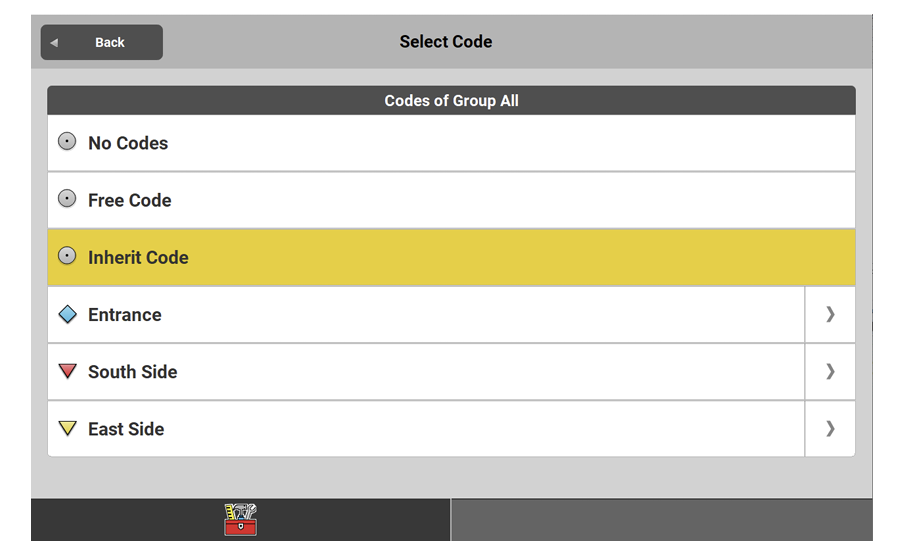
- Tap Start in the Measure bar. Then, before storing the point, tap Code.

- Select Inherit Code.
- Back in the Map View tap Store.
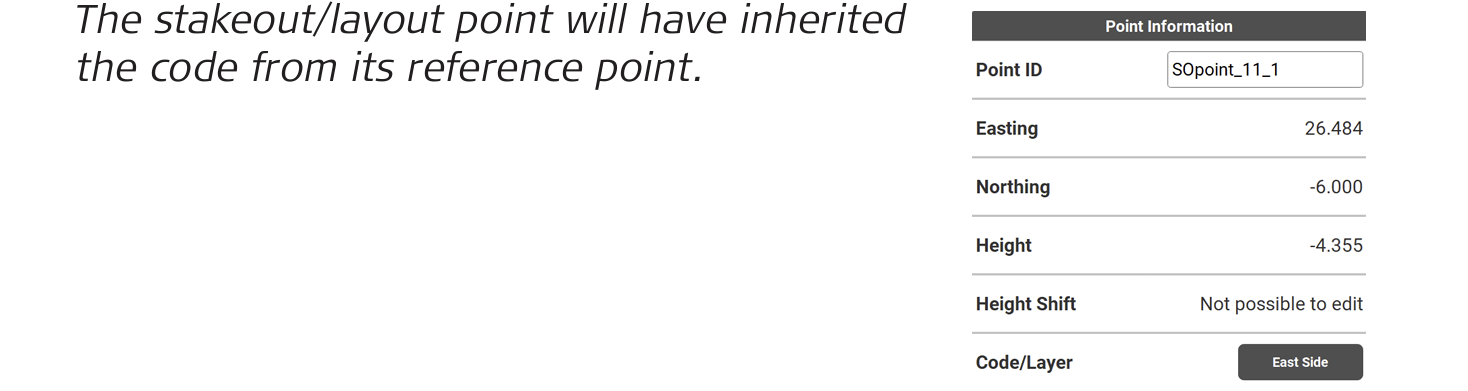
- Tap and hold the point in the Map view to inspects its point information.
- Select the next point to be staked out/laid out.
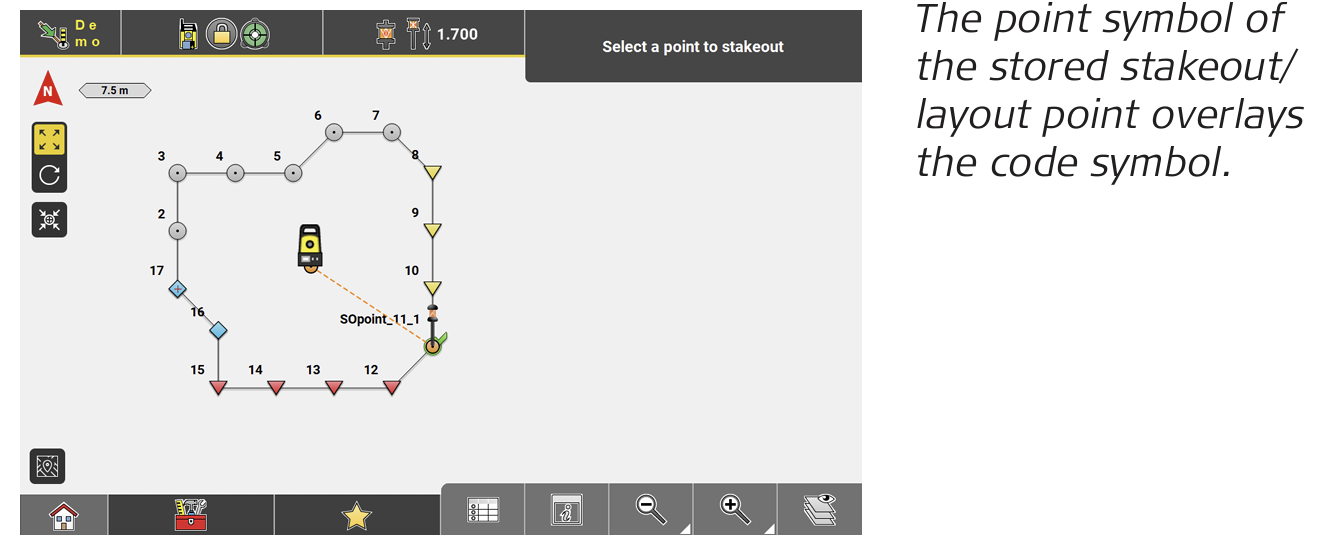
 When Inherit Code is active the stakeout/layout point will get the same code as its reference point, even if the code has changed.
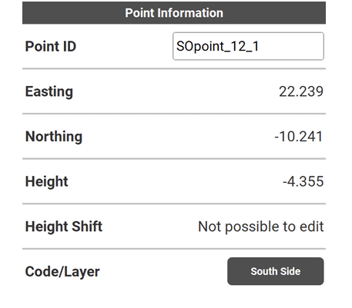
↪ If attributes are defined for a reference point these will also be inherited.