General description  Given:
• Instrument is connected and set up with known station and height.
• Road model active within the current job. Refer to Importing data to the project step-by-step.
➜ Note that the main workflow refers to using a Total Station. For GNSS press Measure to record a point.
Stake out cross slopes using Cross Section view
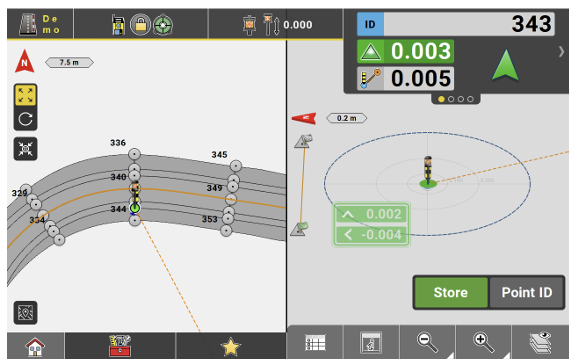
- Open the Roading app.

Map screen is displayed. - Select a cross slope to stake and press Start.
➜ To select a cross slope, a measurement needs to be available and Road Shading needs to be enabled in Viewing Options > Surfaces. - Navigate the target "over" the selected cross slope.
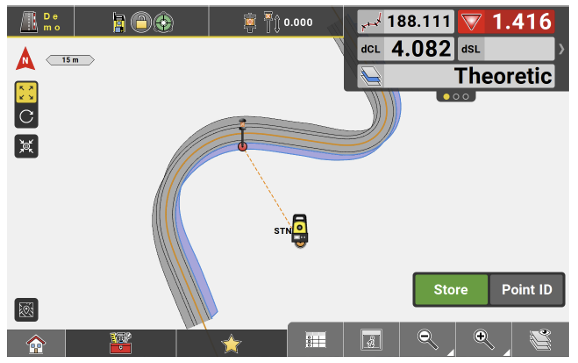
- From the Map Handler select View
 > Cross Section.
The view changes into cross-section mode and the target is shown against the cross section at the current chainage of the selected cross slope.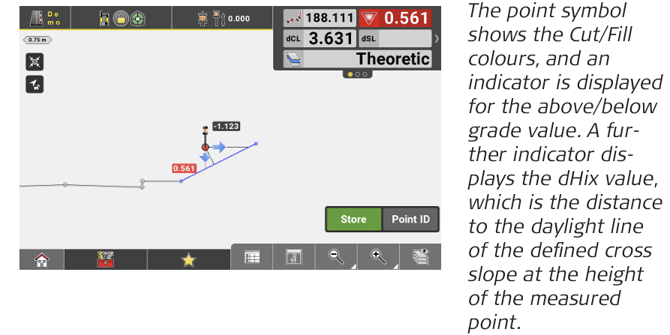
- Once the target is within tolerance, tap Store and mark the staked position in the field.

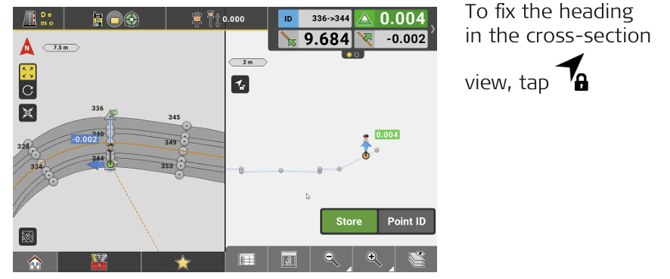
➜ To fix the heading in the cross-section view, tap
➜ To return to the regular Map view, deselect Cross Section from the Map Handler.
Stake out Offsets and modify cross-slope inclination
- To offset a cross slope select Offset Element from the Toolbox.

- Select the cross slope required for offset and enter an offset value for the height.
• Use Flip to switch the offset value from positive to negative.
• Tap , in order to apply the entered value as a vertical offset.
• To apply the entered value as a perpendicular offset, tap .
.
• To modify the inclination of a selected cross slope, enter the desired inclination value. Depending on the Unit Settings for Slope Display, the inclination value needs to be entered as H:V, V:H, % or Elev. Angle.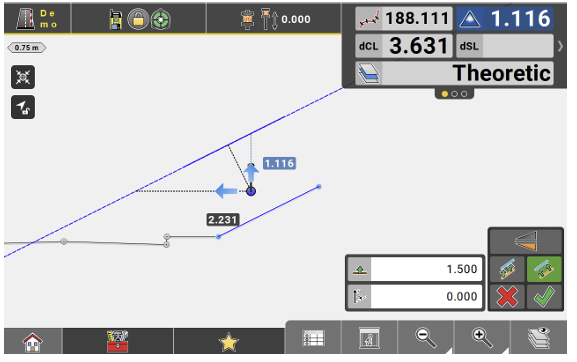
- Tap
 to accept and continue with staking out the offset element.
Stake out cross-sections using permanent points/lines
- Open the Roading app.

Map screen is displayed. - Select a road line and press Start.
- From the Toolbox select Create cross section.
The Create Cross Section page is displayed. - Select Create using > Permanent.
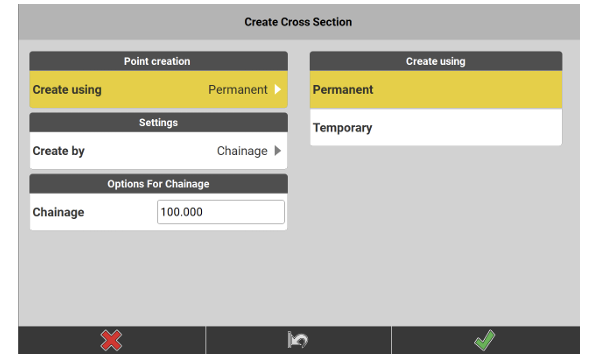
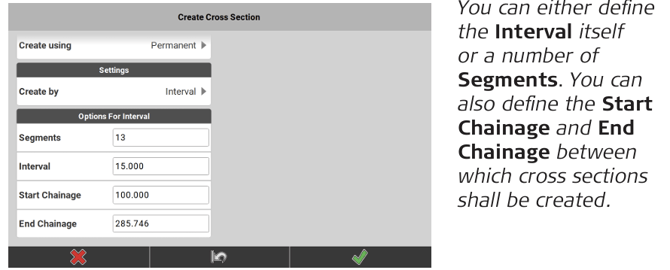
- Select Create by > Chainage and define a Chainage , in order to create one cross section at the given chainage. In order to create several cross sections along the road line at a given interval, select Create by > Interval and define the Interval.
- Tap
 to confirm your settings and proceed.
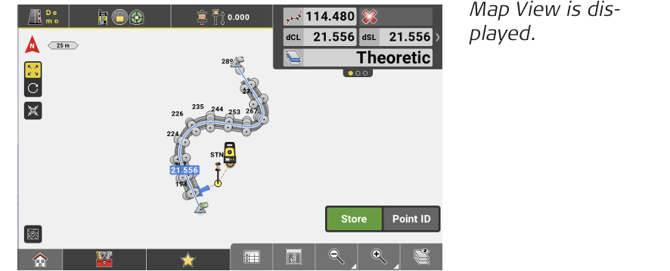
- Select the cross section line to be staked out and move the target towards it.
 ➜ Tap View
  > Multiview Config from within the Map Handler to select a different view option.
 - Move the target until it is within position and height tolerance. Then tap Store and mark the staked position in the field.
- Proceed with staking out further points along the cross-section line.
- To stake out one of the cross-section points, tap on the point to select it.
- Move the target towards the selected point.

- Move the target further towards the temporary point/line until it is within tolerance. Then tap Store and mark the staked position in the field.
- Repeat the procedure until all required cross-section elements are staked.
➜ Alternatively, temporary cross sections can be created. See also: Stake out cross-sections using temporary points/lines
Stake out cross-sections using temporary points/lines
- Open the Roading app.
Map screen is displayed. - Select a road line and press Start.
- From the Toolbox select Create cross section
The Create Cross Section page is displayed. - Select Create using > Temporary.
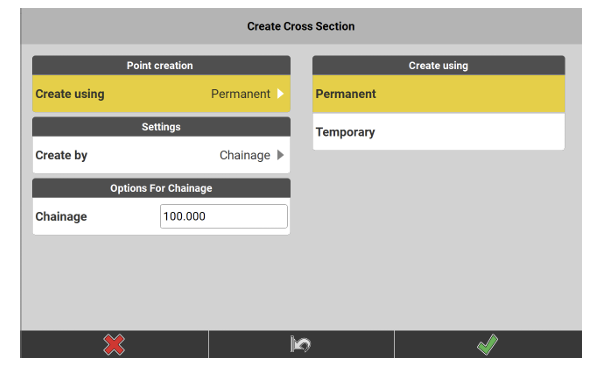
- Define an Interval and select a Start Chainage.
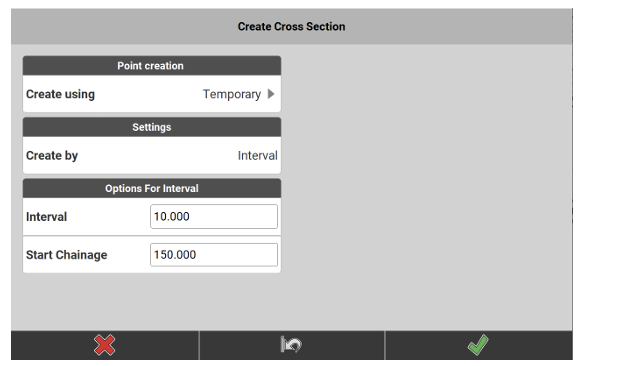
- Tap
 to confirm your settings and proceed.
Map View is displayed.
➜ By default, the Map View opens in split view.
Tap View > Multiview Config from within the Map Handler to select a different view option.
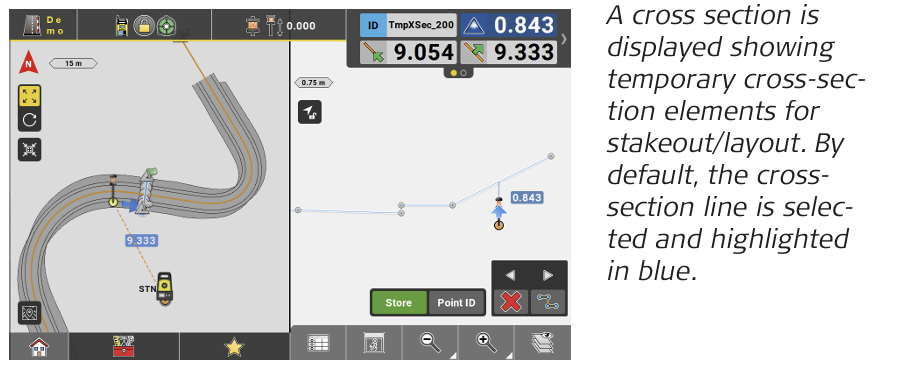
- Move the target towards the selected line. The cross-section view displays an indicator for the above/below grade value.
Move the target until it is within position and height tolerance. Then tap Store and mark the staked position in the field.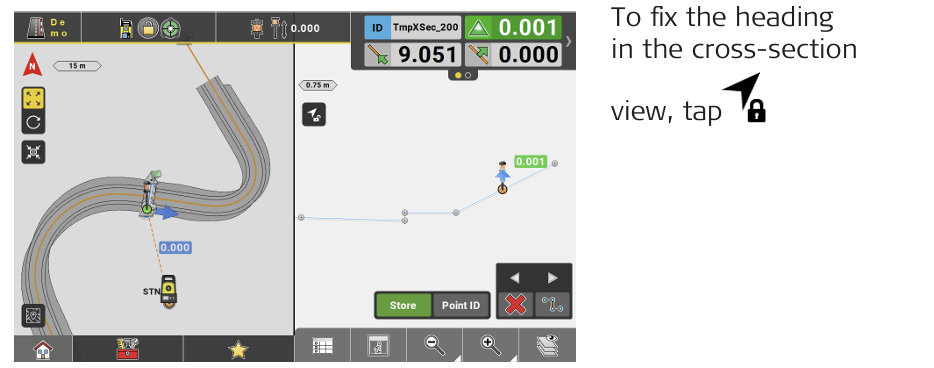
- Proceed with staking out further points along the cross-section line.
- To stake out one of the temporary cross-section points, tap on the point to select it.
- Move the target towards the selected point.
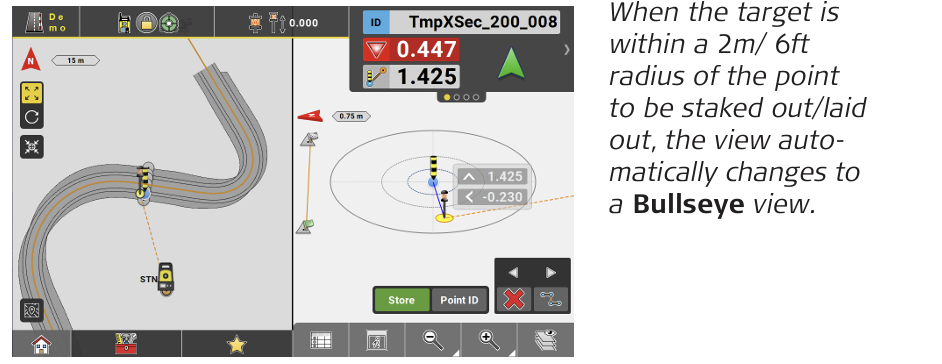
- Move the target further towards the temporary point/line until it is within tolerance.
Then tap Store and mark the staked position in the field.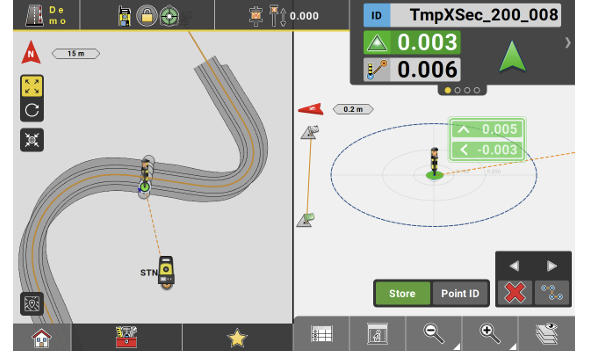
- Repeat the procedure until all temporary cross-section elements are staked.
- When the temporary cross section is fully staked, tap
 or
or  to proceed to the previous/next temporary cross section and continue staking out elements.
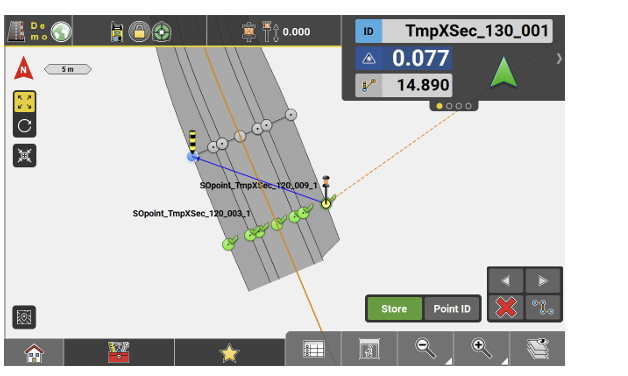
➜ Tap to create cross sections at the break points of the centreline.
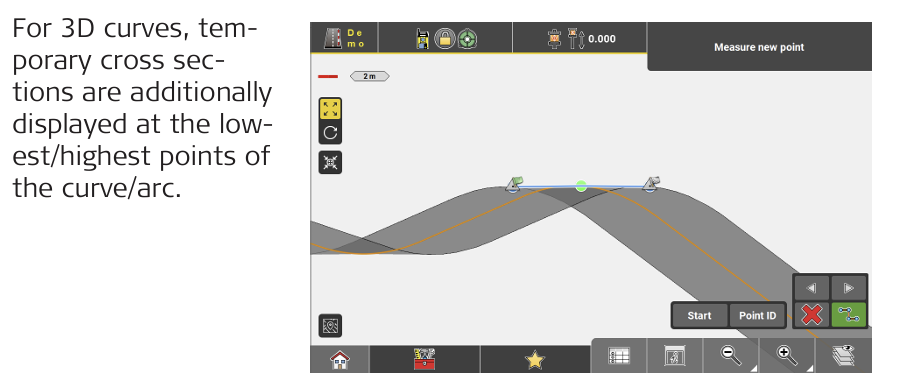
With this function being active, temporary cross sections will not only be displayed at the selected interval but also at locations where the centreline of the road changes its geometry, for example from straight to arc or from arc to straight.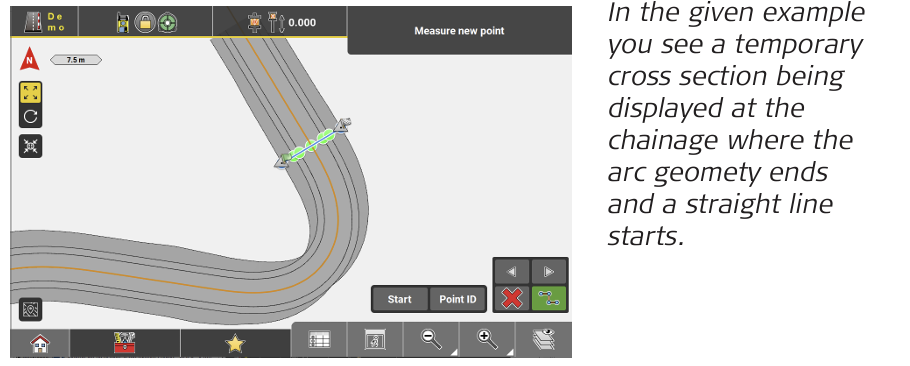
➜ If there are changes in the continuous rise or fall of a road line, this will also make temporary cross sections being displayed.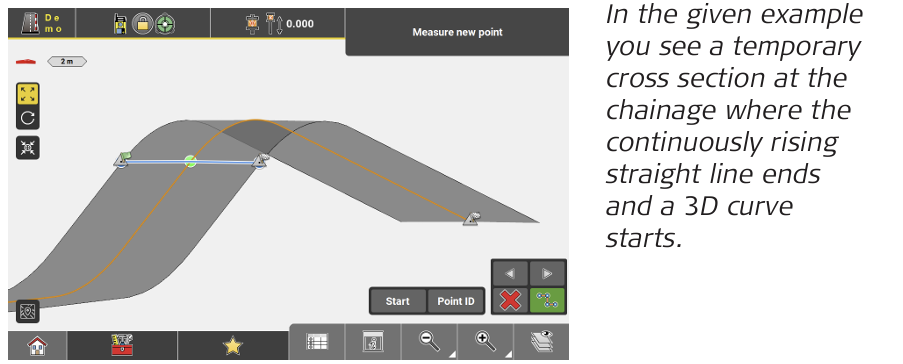
➜ To leave the temporary stakeout/layout function tap .
.
➜ Alternatively, permanent cross sections can be created. See also: Stake out Road Lines using Cross Section view