Stand-alone operation step-by-step
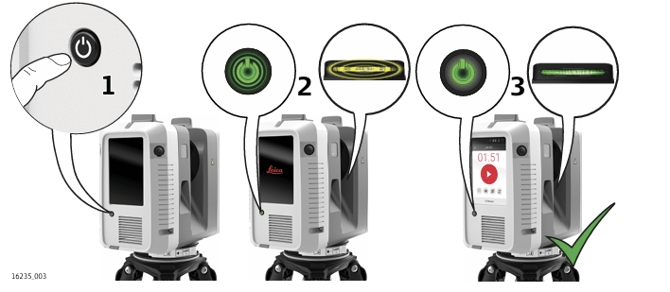
- Press the power button to turn on the instrument.
- The instrument is starting. The power button is blinking green and the LED indicator is blinking yellow.
- When the user interface is visible, the instrument is ready for operation. The power button and the LED indicator are now continuously green.
➜ Do not touch or move the instrument while the system is recording.
Operation with hand held device connection step-by-step
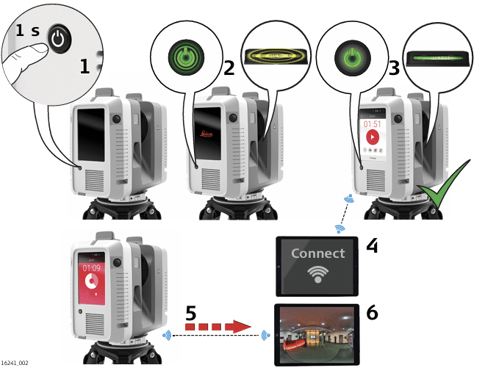
- Press the power button to turn on the instrument.
- The instrument is starting. The power button is blinking green and the LED indicator is blinking yellow.
- When the user interface is visible, the instrument is ready for operation. The power button and the LED indicator are now continuously green.
- Connect the handheld device with the instrument.
- Start the recording and simultaneous data transfer with the hand held device.
- Start the processing of data on the handheld device
Connecting to a handheld device step-by-step
- Start the instrument and wait until the user interface is visible.
- On the handheld device select Settings and tap WLAN.
- Select the network RTC360-298xxxx/RTC360LT-3005xxx in the
WLAN settings to be connected.
➜ The number 298xxxx/3005xxx is the serial number of the
instrument. - Enter the password.
➜ The instrument specific password is printed on the type label in the battery compartment, for example "test1111"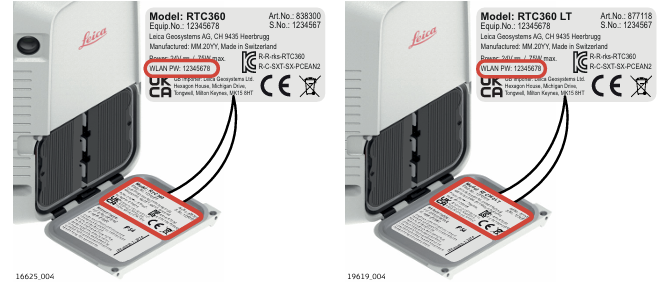
- Start the app and connect the instrument.
➜ For further information, refer to the help menu in the app.