Description: The combined adjustment procedure determines the following instrument
errors in one process: 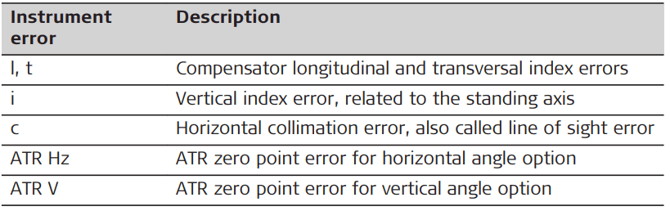
Combined adjustment procedure step-by-step: The following description explains the most common settings
- Connect the device with the Instrument.
- Select Devices from the Home Menu.

- • Select your instrument and tap the arrow.
• Select Sensor Calibration.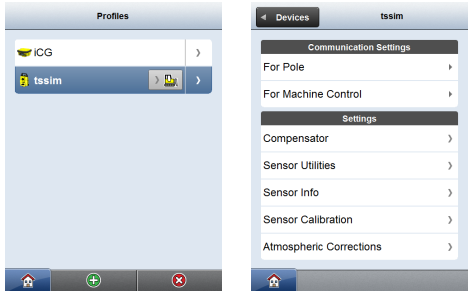
☞ It is recommended to use a clean Leica circular prism as target. Do not use a 360° prism. - • Select the incl. ATR Calibration option if you like to calibrate
the ATR.
• Tap to see which instrument errors are determined.
• Follow the wizard which guides through the calibration.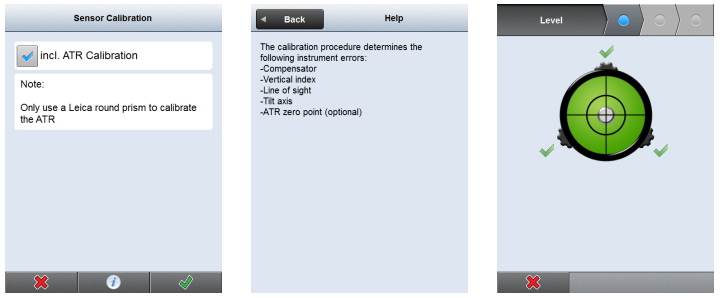
- • Aim the telescope accurately at a target at about 50 m distant. The target must be positioned within ± 9°/± 10 gon of the horizontal plane. Start the procedure in telescope face one.
• Press the measurement keys to measure and to continue to the next step.
• Motorised instruments change automatically to face one.
☞ The fine pointing has to be performed manually in both faces. - •Tap
 in the wizard to get to the next page.
• Aim the telescope accurately at a target at about 50 m distant or less if not possible. The target must be positioned at least 27°/30 gon above or beneath the horizontal plane.
• Press the measurement keys to measure and to continue to the next step.
Motorised instruments change automatically to the other face.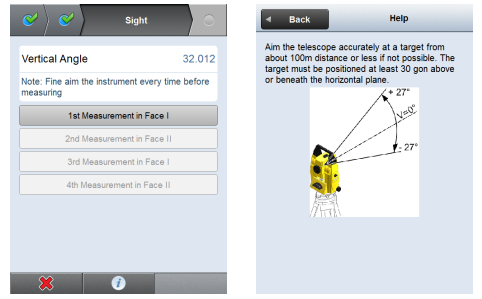
☞ The fine pointing has to be performed manually in both faces. - Adjustment Accuracy
After pressing the last in the wizard the results are shown and stored to the instrument.
- Tap
 to get back to the Devices page.