➜ Drill Pattern license needed.
General description
The Drill Patterns creation functionality allows to define drilling or piling patterns for drill rigs. Once the pattern is created, transfer it to iCON Rig machines running MC1 or VisualMachine.
How to create drill patterns step-by-step
- Import the data you want to apply. For example: Points, lines, polylines, road lines, and so on. Refer to 2.2 Import, Export, or Delete Data.
- Open the Draw app.

- Select Patterns from the Sketching Functions menu.

- Select Drill Patterns to start the Wizard.
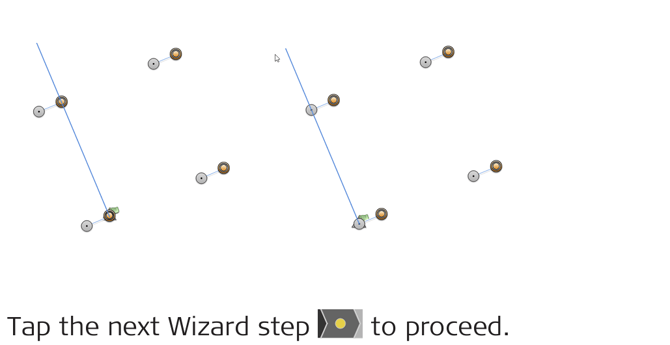
- Define the direction of the pattern.
 Select two points, a line or a polyline to define the forward direction
of the pattern.
• Tap to flip the start and end point of the line.
• To offset the line, enter a value at
• If necessary, define the start and end chainage of the line in the toolbar.
Tap the next Wizard step to proceed.
 - Define and dimension the pattern. The pattern points are the bottom points of the drill holes.

➜ If any combination of the forward holes spacing with the number of forward holes exceeds the end point of the line, a message appears with options to retract or overshoot the pattern.
• Retract: The pattern stops before the endpoint of the line. • Overshoot: The pattern extends by one set of forward points. - Define the height of the pattern points. By default, all pattern points have the height of the start point. There are several options to change the height of the pattern points:
• Manually enter the desired height into the editable field.
• Select a surface to transfer the heights of the surface to the pattern points. Pattern points outside the surface are not created.
• Select the line of a road model to transfer the heights of the model to the pattern points. Pattern points outside the road model are not created.
•Select a line and tap to transfer the height of the selected line.
Tap the next Wizard step to proceed.
 -
-
-
Tap to accept the changes or tap
  to cancel any changes made in this step.
 - Tap
 to finish the wizard.
 - Enter the name for the pattern.
Tap to accept. The pattern is stored as a *.geo file. It is visible on the map for further checking. Turn off the file from the layer manager or delete if not longer needed.
 - Select Export from the Home screen/Admin Panel.
Select Drill Patterns option for exporting.
Export in XML format (IREDES standard) for MC1 or Kof for VisualMa
chine (kof contains the bottom points of the holes).
The file is exported to the Data folder of the internal memory or USB
stick.
It is also possible to export the drill pattern to ConX.
Toolbar buttons and editable fields for defining the pattern
| Toolbar button | Description |
 |
Tap this button to rearrange the pattern into a diamond formation. |
 |
Tap this button to create the pattern on the left side of the line. |
 |
Tap this button to create the pattern on the right side of the line. |
 |
Tap this button to create the pattern at forward direction. |
 |
Tap this button to create the pattern as backward direction. ➜This button is only active, if two points have been selected in the previous step. |
 |
Enter forward holes spacing. |
 |
Enter number of forward holes. |
 |
Enter side holes spacing. |
 |
Enter number of side holes. |
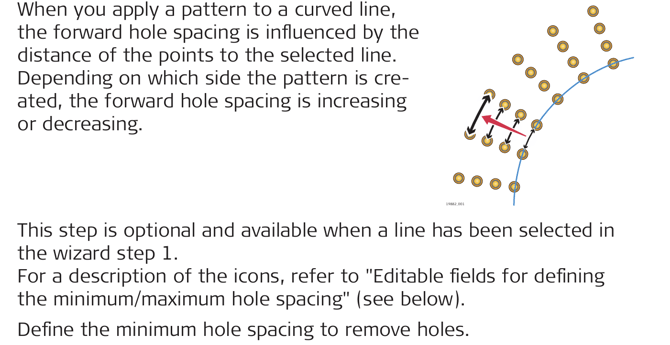
Editable fields for defining the minimum/maximum hole spacing
| Toolbar button | Description |
 |
Enter the minimum hole spacing to remove holes. |
 |
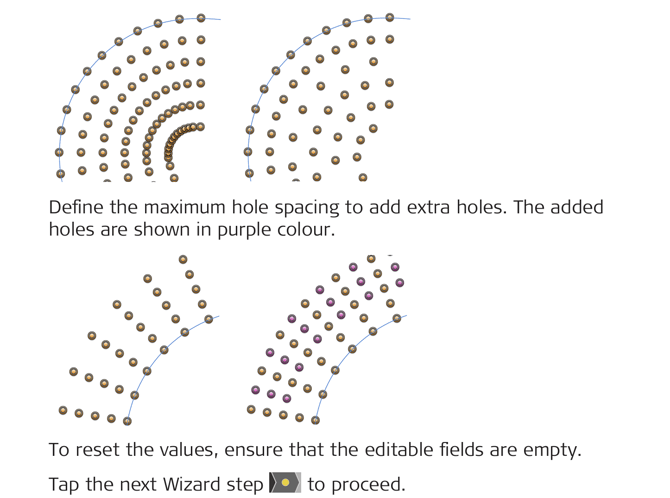
Enter the maximum hole spacing to add extra holes. |
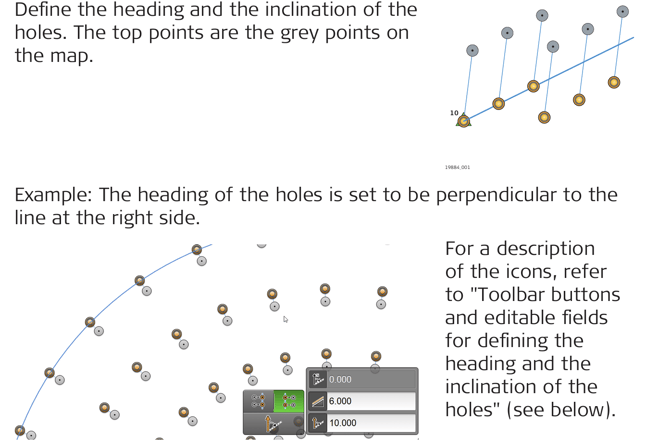
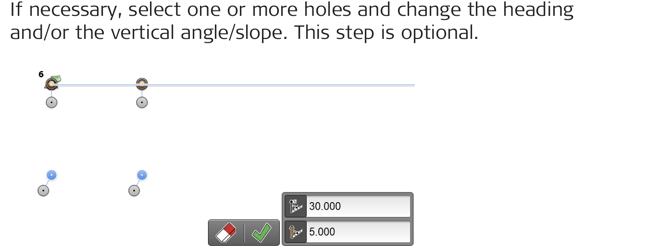
Toolbar buttons and editable fields for defining the heading and the inclination of the holes
| Toolbar button | Description |
 |
Tap this button to set the hole heading perpendicular to the line on the left direction. |
 |
Tap this button to set the hole heading perpendicular to the line on the right direction. |
 |
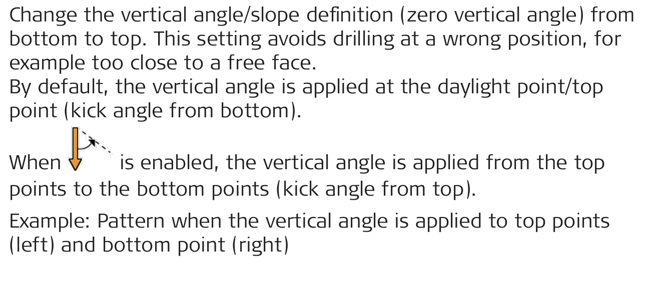
Tap this button to kick the vertical angle/slope from top. By default the vertical angle/slope is applied from the bottom. |
 |
Enter the holes heading. |
 |
Enter the distance to the top points. |
 |
Enter the vertical angle/slope of the holes. |