General description: The Camera function allows you to capture images using the integrated camera of the controller. For documentation and reporting purposes, you can link captured images to points.
How to access the Camera screen
↪ The Camera function is accessible from any measuring application using the Measure bar. It is not available in TPS Setup, GNSS Base Setup or when creating a Coordinate System.
↪ You need to configure the Measure bar to display the Camera button.
↪ When using the iCON software, the Camera button is available in the Favourites menu by default.
- To enable the Camera function, tap and hold the Measure bar.
- Configure the Measure bar to display Camera. For a detailed instruction, refer to Measure bar. Tap
 to accept the settings and return to the map.
 - Tap Camera to access the Camera screen.
↪ For a detailed description of the Camera screen, refer to The Camera screen.
The Camera screen 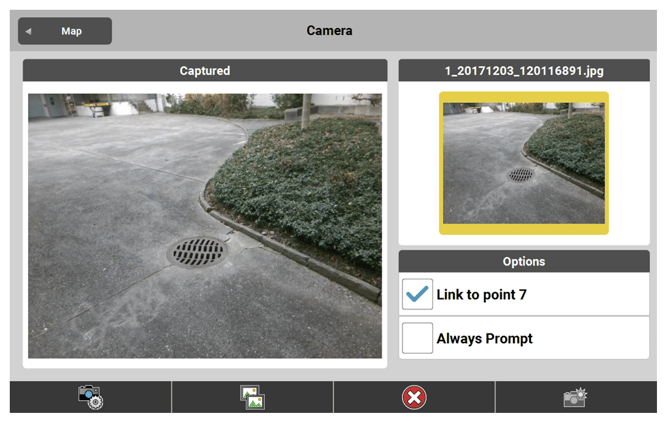
| Screen element | Description |
| Back button | Tap to return to the Map view. |
| Live container | Live image of the camera. |
| Image container at the right |
Preview of the last captured image. ↪ If there are no captured images the preview is empty. ↪ To get an enlarged preview image, tap the preview image. The live image of the camera is To return to the live image, tap either the enlarged or the small preview image. |
| Options container with checkboxes |
Link to point %1 ( (Point number of last stored point is displayed.) Activate the checkbox to link the captured Always Prompt Activate the checkbox to display the Camera screen automatically each time a point is stored.
|
 |
Tap to adjust the camera settings. Refer to Adjusting the camera settings. |
 |
Tap to view and manage all captured images. Refer to The Gallery screen. |
 |
Tap to delete the last captured image. |
| Screen element | Description |
 |
Tap to capture an image. |
Adjusting the camera settings
- To display the Camera Settings screen, tap
 screen.
 - • Tap Device Name to toggle between front and back camera.
• Tap Resolution to set the image resolution.
• To activate geotagging, set Geotagging to On. Geotagging requires a connection to a GNSS sensor or the internal GPS of the controller. When geotagging is enabled, the GNSS coordinates are stored to the captured image.
• To add drawings or text to an image directly after capturing, activate the option Always edit the image after capture. By default, this option is disabled. - Tap
 to accept the settings and return to the Camera screen.
The Gallery screen 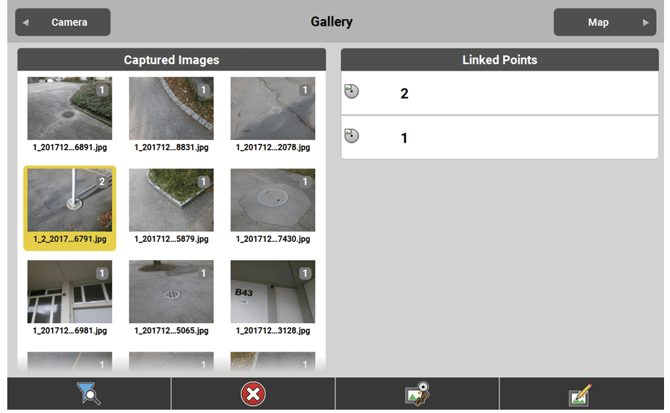
| Screen element | Description |
| Camera button | Tap to return to the Camera screen. |
| Captured Images container |
List of captured images, displayed as thumb • Tap a thumbnail to select it and to dis • Tap a second time to enlarge the image |
| Linked Points container | List of points which are linked to the selec ted image. |
 |
Tap to define and apply a filter to the list of images or linked points. Refer to Filtering the list of images/points. |
 |
Tap to delete the selected image. |
| Screen element | Description |
 |
Tap to link one or several points to the selected image. Refer to Linking images to points. |
 |
Tap to edit the selected image. Refer to Edit images. |
Filtering the list of images/points
The Gallery Filter tool helps you to quickly find relevant images or points by using different filter options. For example, you can sort or reduce the list of images displayed in the Gallery.
- To display the Gallery Filter screen, tap
 in the Gallery screen.
 - Define the necessary filter options:
• Select the job that contains the relevant points for linking.
• Define the sort order of the images based on the creation date: ascending or descending.
• Define the sort order of points available for linking: ascending or descending.
• To show a maximum of 50 images, activate the checkbox.
• To show only images which are not linked to any points, activate the checkbox. - Tap
 to accept the settings and return to the Gallery screen.
↪ When you exit the Camera application, the filter options are reset back to default values.
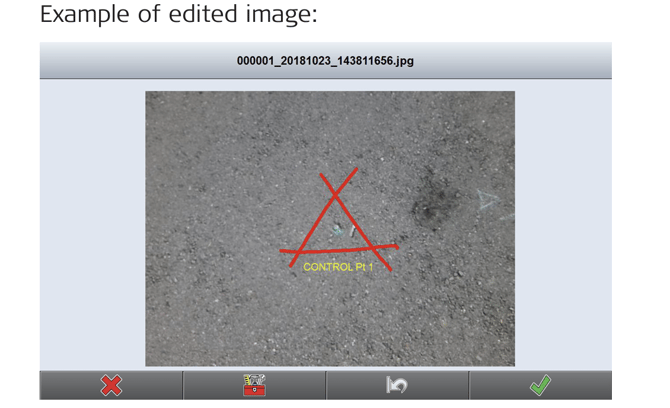
↪ You can add text and free-hand drawings to a captured image. To edit images directly after capturing, activate the respective option in the camera settings. Refer to Adjusting the camera settings.
Edit images
- In the Gallery screen, tap the image you want to edit. The selected image is highlighted in yellow.
- Tap
 to edit the selected image.
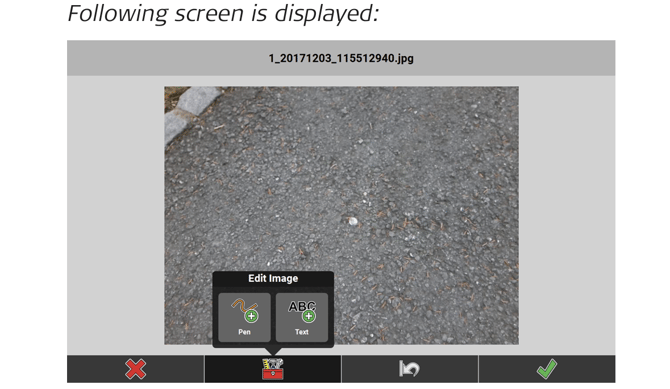
- To add free-hand drawing to the image, select Pen from the toolbox.
 . To add text to the image, select Text from the toolbox.
- To discard all changes, tap
 .
.
To discard all changes and return to the Gallery screen, tap .
.
To save the changes for the image, tap .
.
Linking images to points
↪ The images displayed in the Gallery screen can be linked to points of the currently selected job. If necessary, change the filter options. Refer to Filtering the list of images/points.
- In the Gallery screen, tap the image. (The selected image is highlighted in yellow. If the image is already linked to points, these points are listed in the Linked Points container).
- Tap
 to edit the links. In the Linked Points container, all available points for linking are displayed. For already linked points, the respective checkbox is activated.
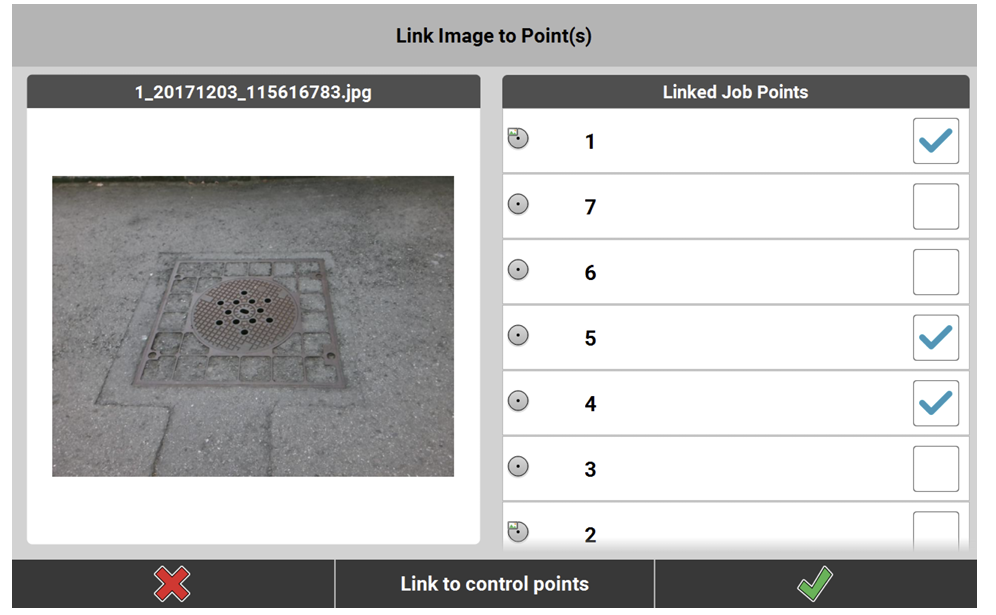
- Activate the checkbox of a point to link it to the image. Deactivate the checkbox of a point to unlink it from the image.
↪ Linking an image to points from reference files is not possible. - Tap
 to save the changes for the image.
Tap to discard any changes.
↪ Images linked to points can be included in a report. To include images, set Captured Images to On when configuring the template of the respective report type. Refer to How to configure the template of a report type.