Leica MC1 allows users to create bucket profiles so the width, length and angle of each bucket they are using is accounted for in the position calculation.
Creating a New Bucket Profile
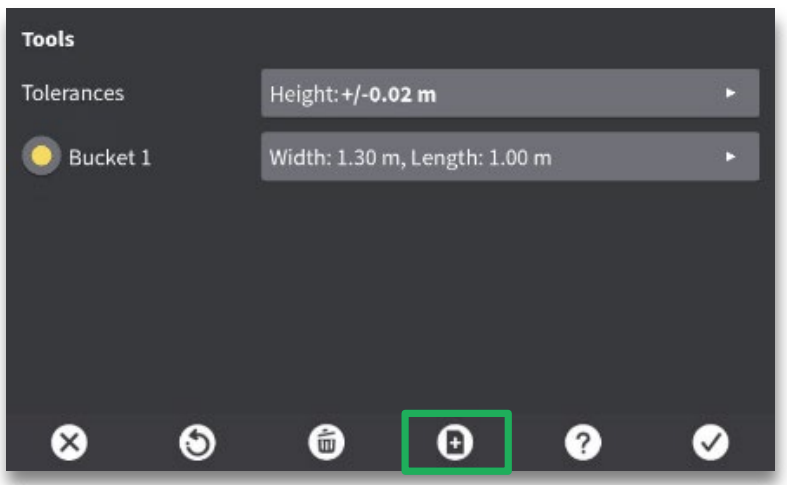
Select Tool menu.

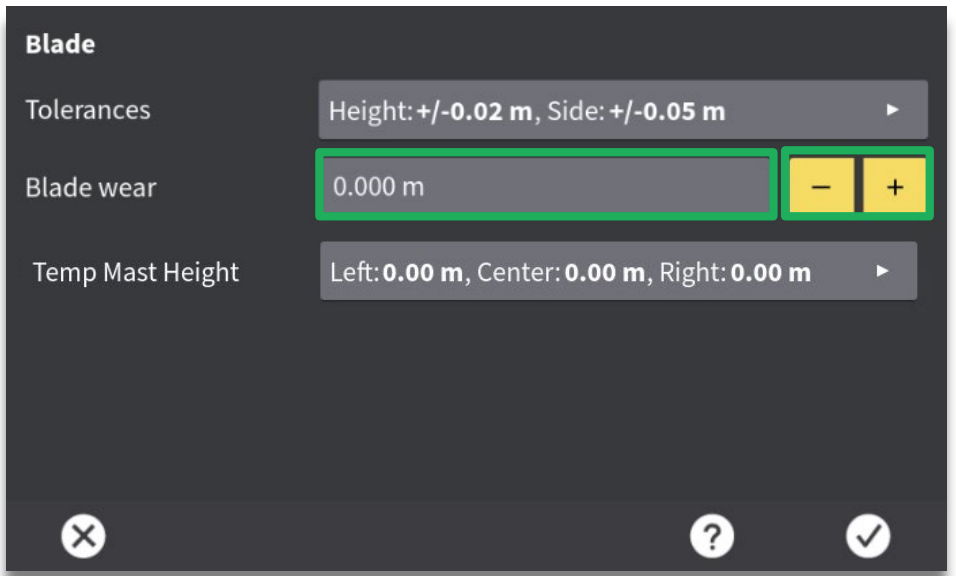
Use the [+] or [-] buttons to incrementally adjust the blade wear based on the new measurement.
Press New Bucket icon.
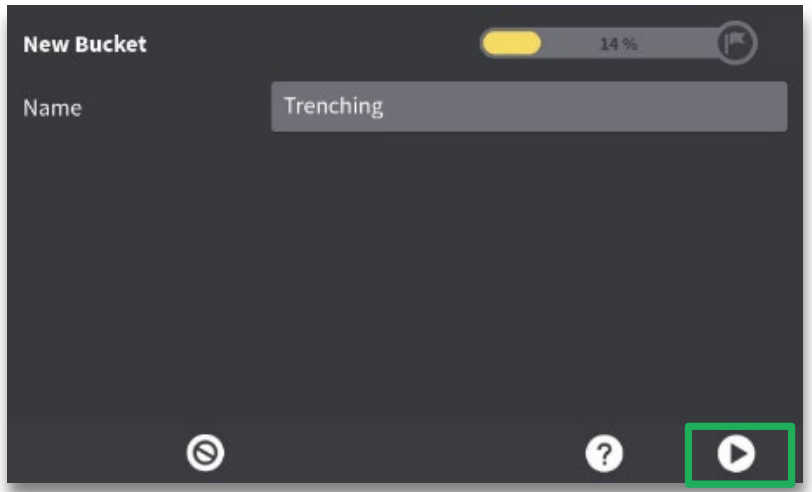
Name the Bucket and hit the check mark.

Press the arrow to proceed.
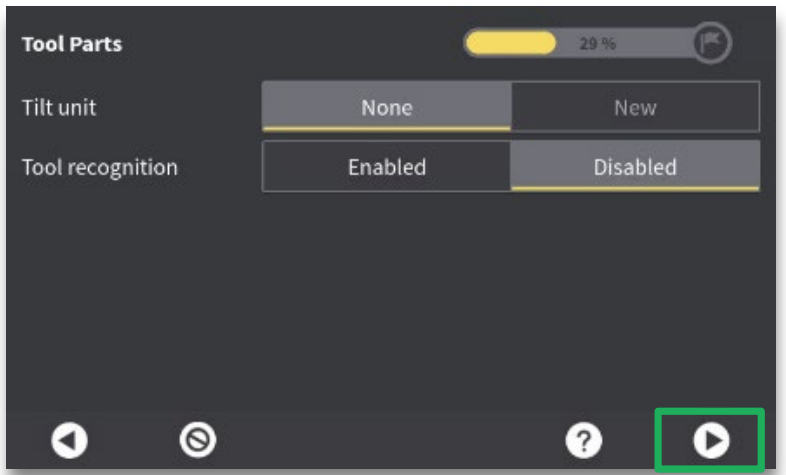
Select Tilt Unit and Tool Recognition if applicable. Hit arrow to proceed.
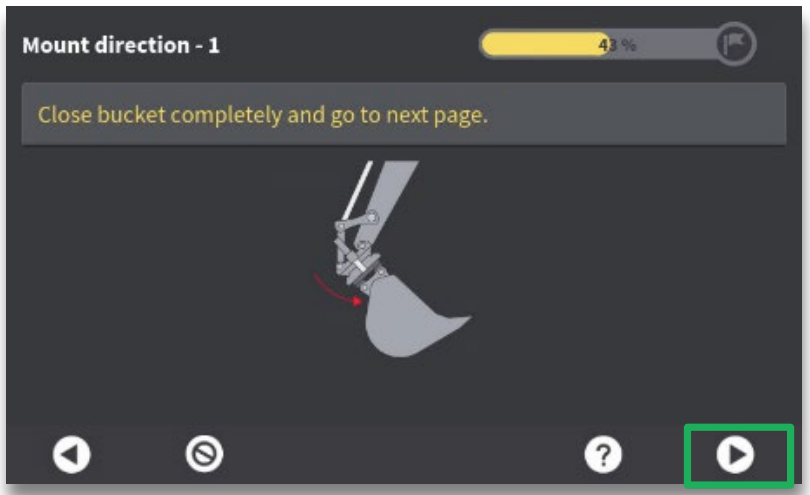
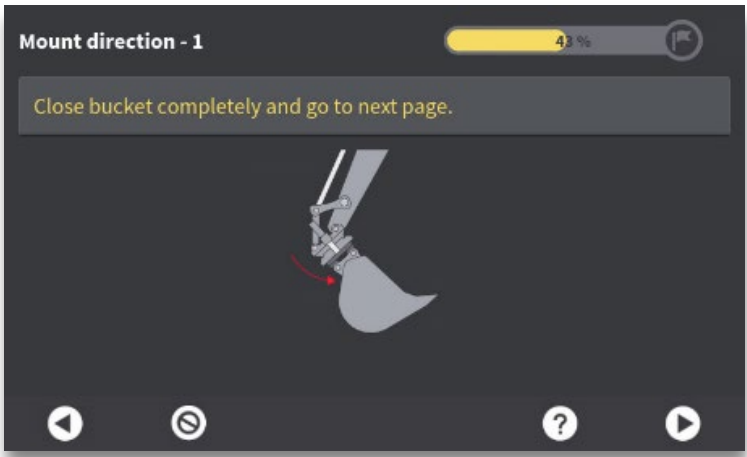
Close the Bucket completely, hit arrow to proceed. Be careful as to not let the bucket hit the cab.
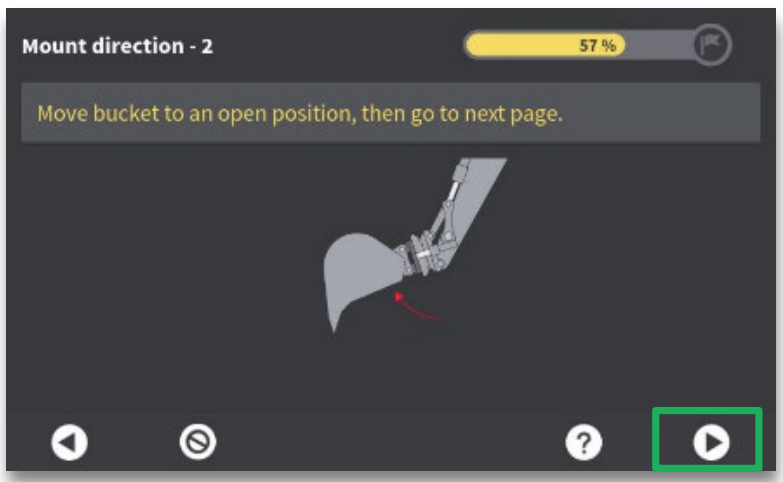
Open the Bucket completely, hit arrow to proceed.
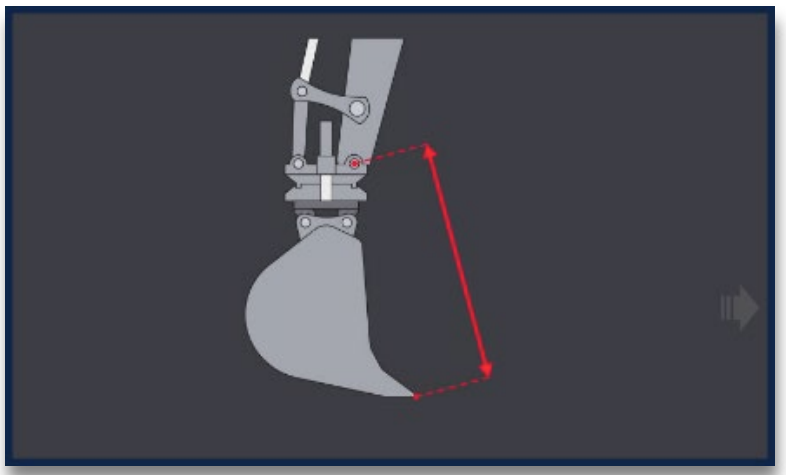
Press the Bucket Length value field.
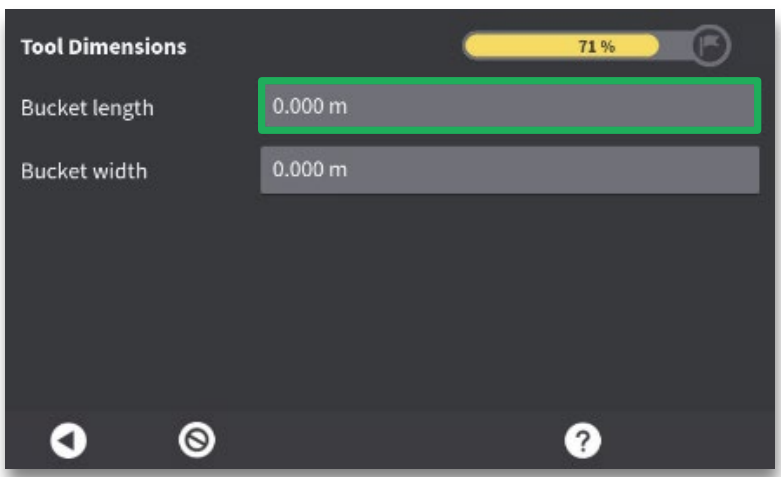
Measure the Bucket Length and enter into the field.

The bucket length is the distance from the tip of the cutting edge/teeth to the bucket/stick or quick coupler/stick pin. Do not measure from the quick coupler/bucket pin!
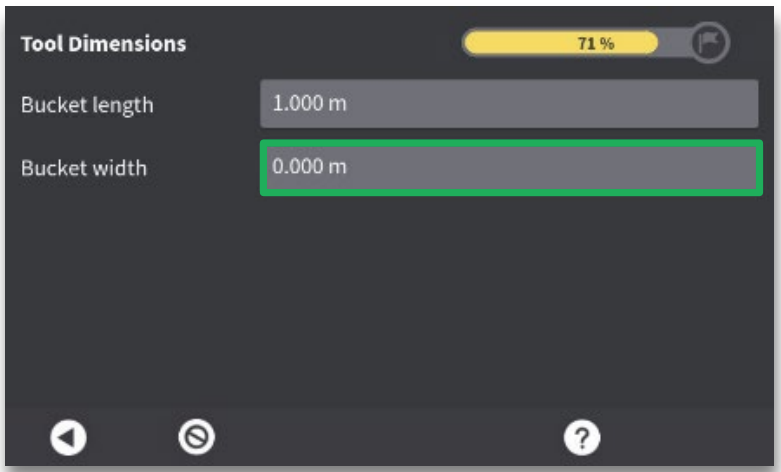
Press the Bucket Width value field.
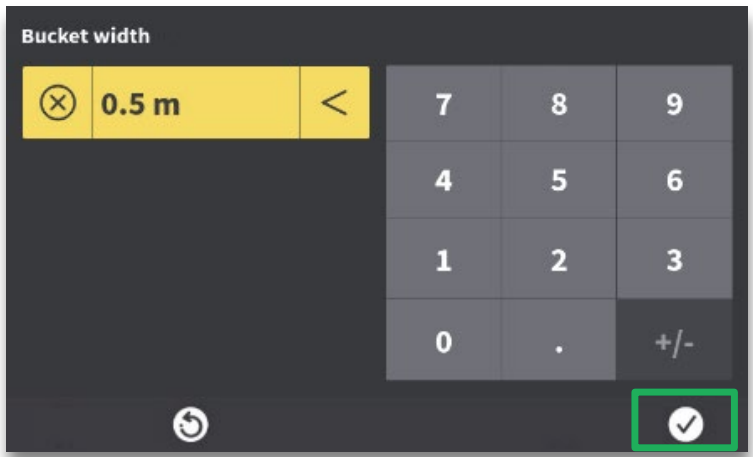
Measure the Bucket Width and enter it in the value field. Hit the check mark to confirm value.

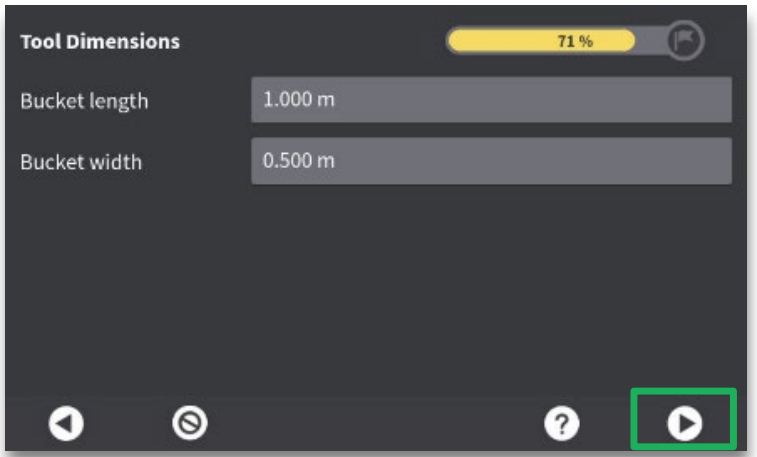
Confirm values are correct then hit the arrow to proceed.
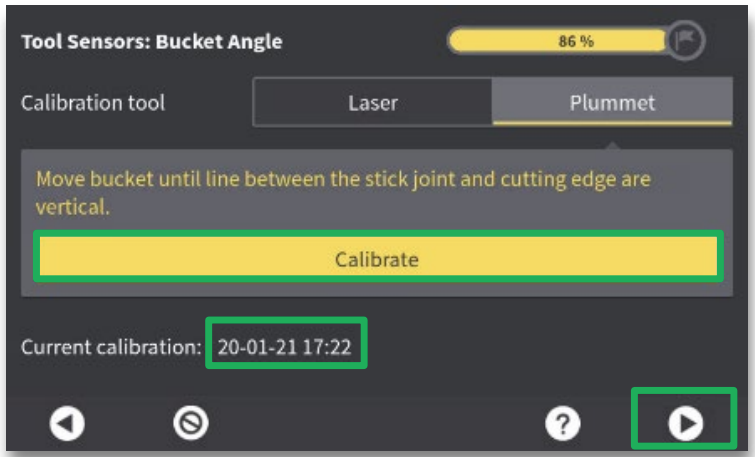
Select the Calibration Tool you wish to use. In this example we will use the plummet (plumb-bob). The laser level calibration will be covered in a subsequent article.

Open or close the bucket until the cutting edge/tooth is directly beneath the bucket pivot point (bucket/stick or quick coupler/stick pin). Use the plummet to confirm that both the tooth/cutting edge and pivot point are plumb with one another.
Pro-tip: Place a magnet on the bucket pivot point pin to hold the plumb bob. This allows a bucket calibration to be performed with one person and prevents incidents from personnel standing near the bucket while adjusting.
Hit Calibrate when the stick joint and cutting edge are vertical. The date and time will be recorded for tracking purposes. Press the arrow to proceed.
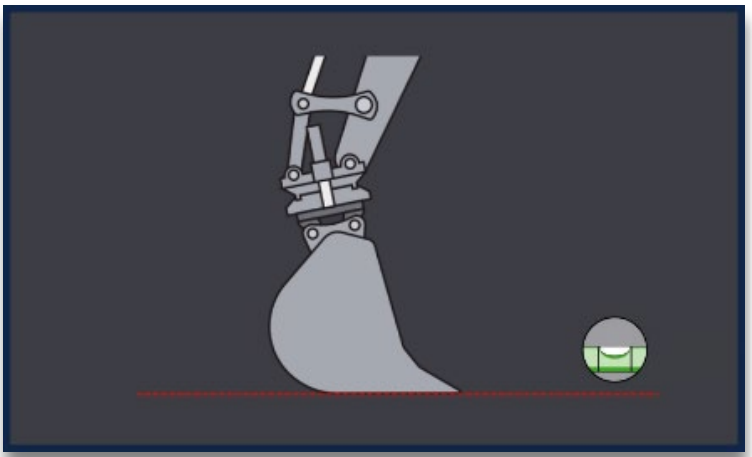
Now close the bucket until the bottom edge is horizontal. Use a level to verify.
Press Calibrate when the bottom edge is horizontal. The date and time will be stored here as well.
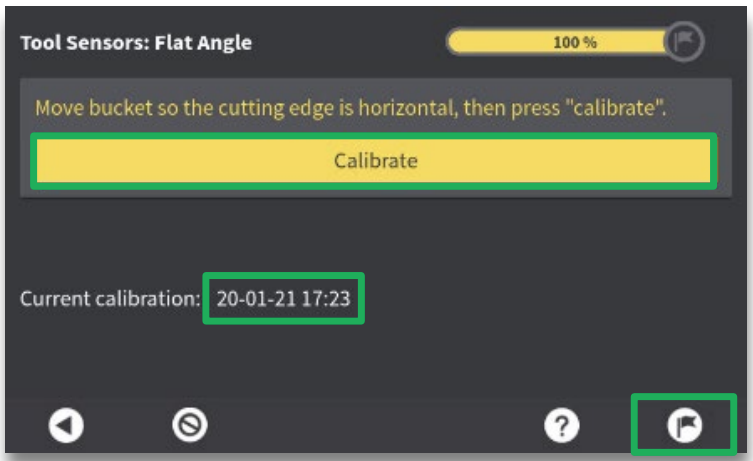
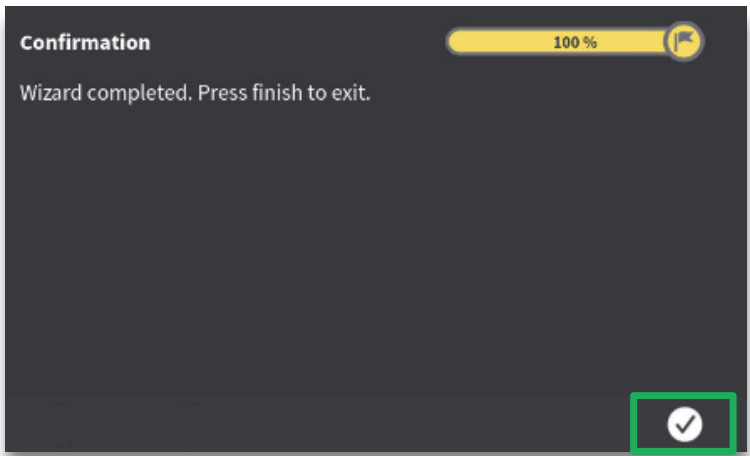
Hit the flag to complete the Bucket Calibration Wizard.
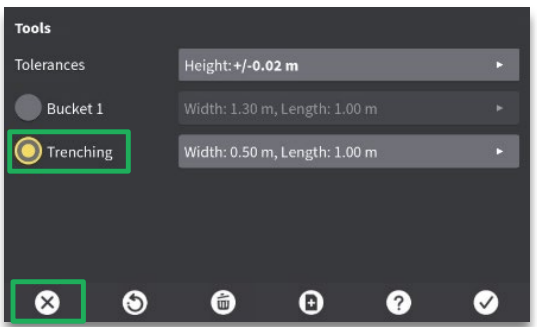
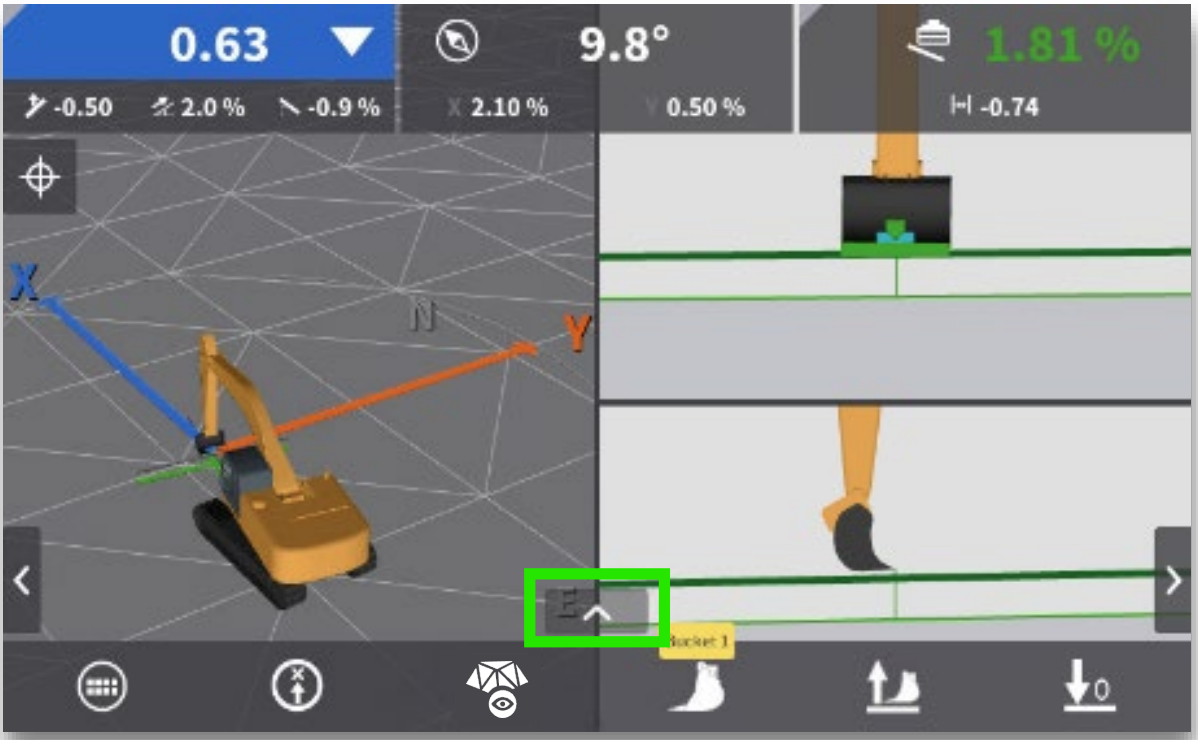
The New Bucket will be selected in the Buckets menu. Press the X to return to the dig screen.
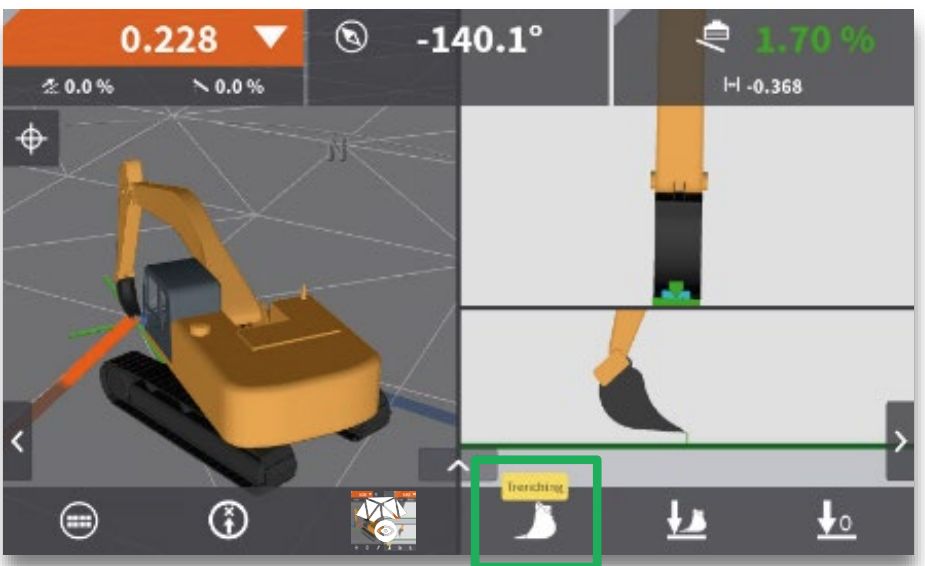
The current bucket is shown in the dig screen within the Bucket Hotkey. You can switch between buckets quickly.
At this point, it is Highly Recommended to Verify the Calibration by checking a known benchmark. Place the bucket on a known benchmark.
Tap on the arrow in the bottom center of the screen to open the Details Menu.
Compare the Coordinates measured at the Tool Point Position with the known coordinates of the Control Point. If the difference between the coordinates are outside of your project specification, repeat the bucket calibration procedure whilst double checking all measurements. If errors persist, please contact your ABTECH Representative. 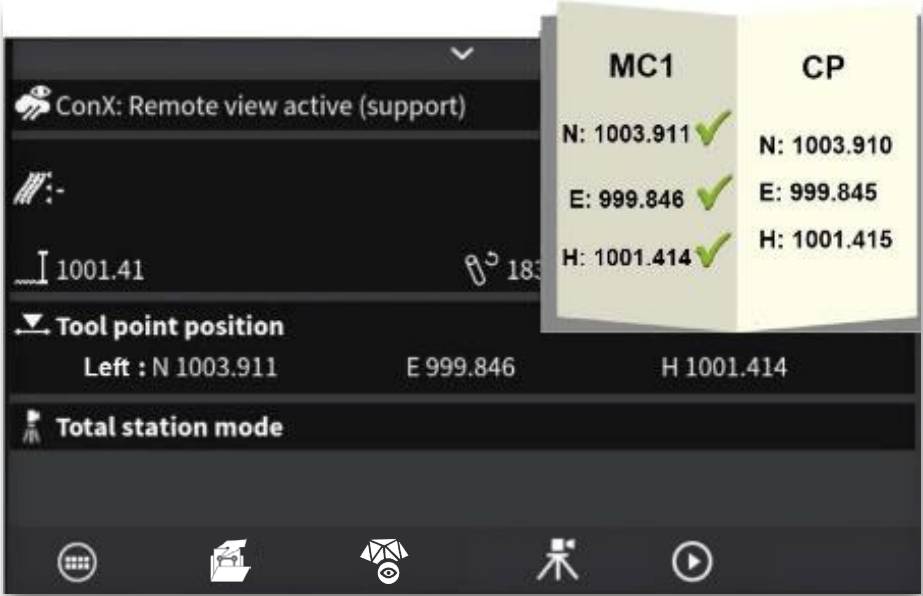
If the measured coordinates are within tolerance, change the bucket/stick angle and check the Control Point again. If the difference between the coordinates are outside of your project specification, repeat the bucket calibration procedure whilst double checking all measurements. If errors persist, please contact your ABTECH Representative.
Pro-Tip: If users are suspicious that bucket may require a calibration do to tooth/cutting edge wear, a quick check is to check position of a stable point (such as a boulder or concrete) at various tooth/bucket angles. If values differ at different angles, are bucket calibration may be required.