This guide is a continuation of the Point Logging article. It is recommended to read through the Point Logging article first prior to this as it covers some basic settings which would need to be configured to utilize Automatic Point Logging.
Automatic Point Logging in Leica MC1 Using the As-Built Application
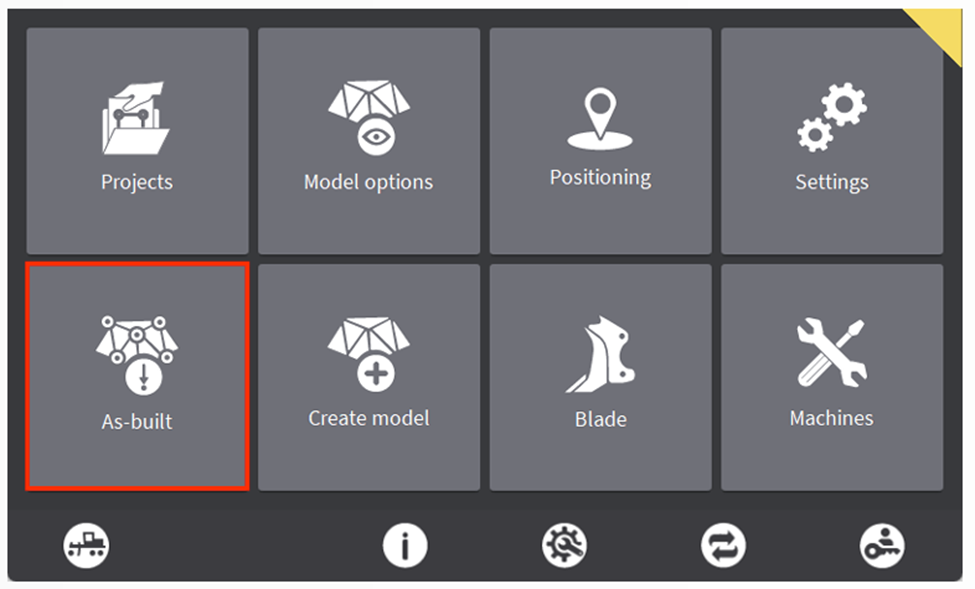
Step 1: Accessing the As-Built Application
From the Home Screen in Leica MC1, select the “As-Built” application.
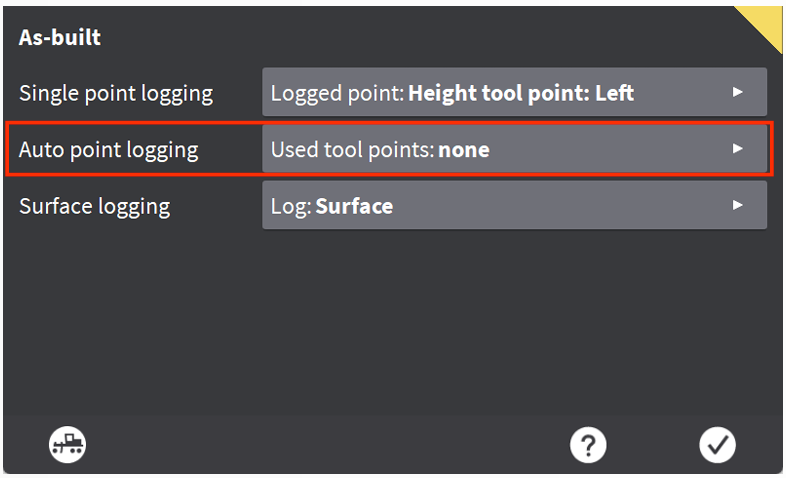
Step 2: Configuring Logging Options
Select Auto Point logging to access the configuration menu.
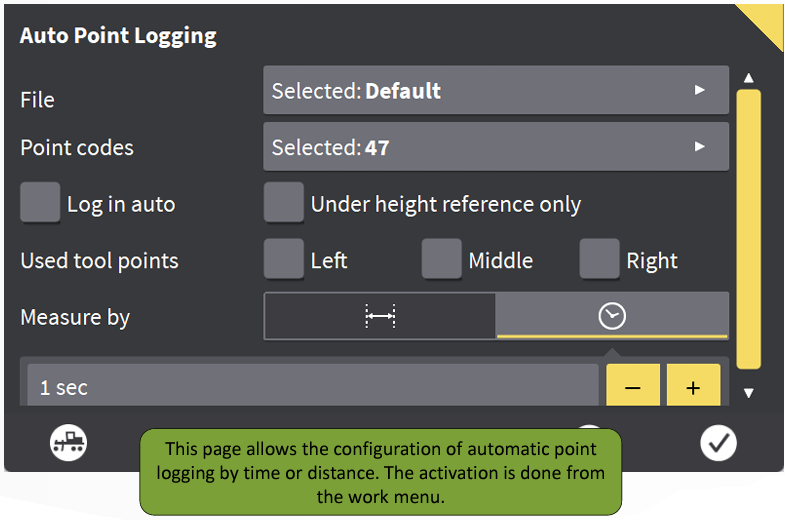
The Auto Point Logging screen offers various configuration options for logging points:
- File: Select/Create a point file (.csv/.txt) in which the automatically logged points will be stored.
- Point Codes: Use this feature to add descriptions to each logged point, enhancing clarity and organization.
- Log in Auto: Select this to enable Auto Point Logging
- Under Height Reference Only: Select this to prevent points from being logged when not over a height reference (i.e. not over surface or over a line)
- Used Tool Point: This setting determines where on the bucket or blade the point will be recorded.
- Measure By: Specifies the frequency at which points will be automatically logged.
- Distance
 : Can be used to specify a distance at which points are logged (i.e. every 5 ft)
 - Time
 : Can be used to specify a time interval in which points are logged (i.e. every 1 second)
- Distance
Step 3: Begin Auto Logging
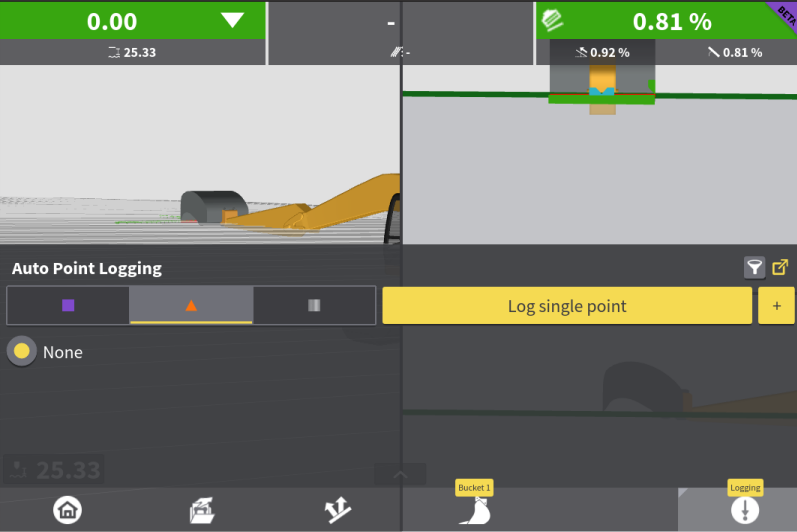
Return to the Run Screen by selecting the Dig/Grade button in the bottom left corner. To enable Automatic Logging settings which were configured, press and hold on the Log Point button.
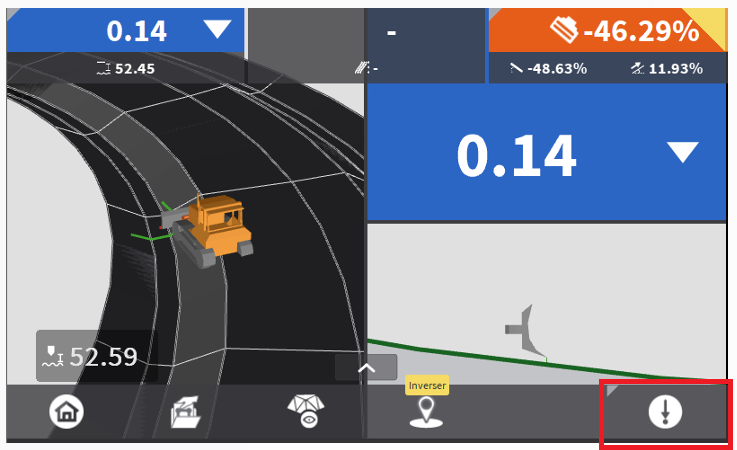
Select the Triangle to Enable Auto Logging. You will see that the "Logging" icon will now appear above the Point Log button showing the points are automatically being logged.
Additional Features and Notes
-
Adjust Settings on the Fly:
Tap and hold the Log Point button to access a menu where you can change settings, such as selecting different codes.
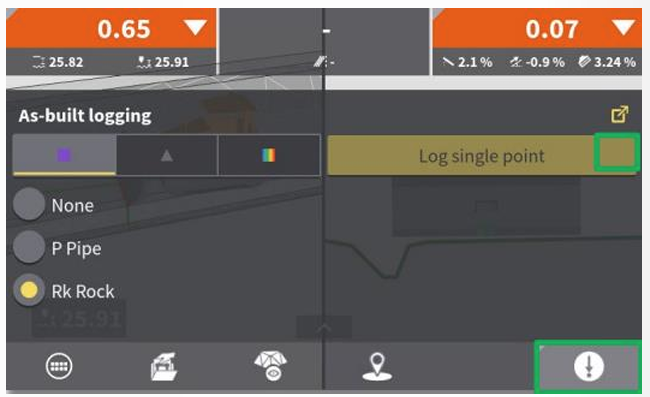
-
Use the Expand Button in the top right of this menu to quickly return to the Single Point Logging Menu to adjust code lists or the point location along the bucket/blade.
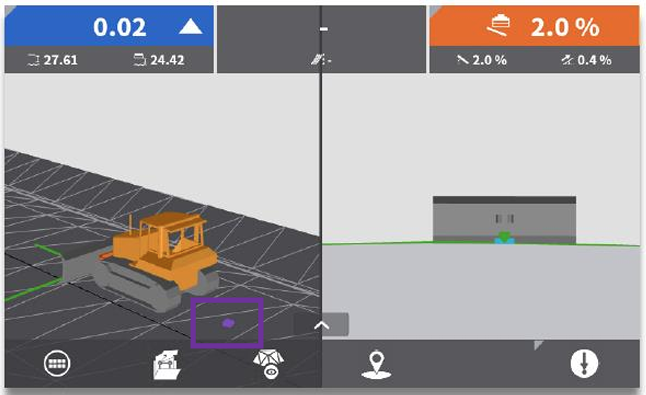
- Point Logging Details:
- Previously logged points are displayed as purple squares on the map, depending on the configuration.
-
Multi-Machine Collaboration in ConX:
If multiple machines are connected to the same ConX project, logged points from other machines will also be visible. -
Exporting Points from ConX:
Points logged within a ConX project cannot be exported via USB. They must be extracted through the FilesAsbuilt tab in ConX. -
Survey Point File Data Structure:
The exported.csvfile contains detailed information, including:- Point number, code, and description
- Coordinates (East, North, Altitude, Latitude/Longitude WGS84, and Ellipsoidal height)
- GNSS accuracy (CQ3D), date, and time
- Machine name in ConX, panel serial number, and bucket name
- Reference details (height, height offset, and transversal reference information)
- Distance to reference points, chaining, and centerline distance
-
Survey Point File Creation and Export:
A survey point file is automatically created using the name of the active reference. Files can be exported via USB or accessed directly in ConX.- File names follow this structure:
- Active reference name.extension.csv (e.g.,
HighwayE20.xml.csv) - When synchronized with a USB, the MCP80 display's serial number is appended to the file name (e.g.,
HighwayE20.xml.123456.csv). - Files are stored in the Asbuilt subfolder under the project directory on the USB (e.g.,
USB/Projects/Leica Highway/Asbuilt).
- Active reference name.extension.csv (e.g.,
- File names follow this structure: